
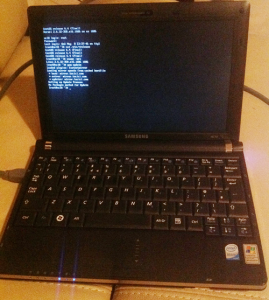
Today was a rather exciting day for me: I’ve successfully turned my aging Samsung NC10 Netbook into an internal server in our office.
I bought the little guy in 2009 and he’s been my trusty companion on many jobs before I got an iPad. He still works fine, even though Windows XP was getting weird of late – and admittedly I hadn’t even turned him on in over 8 months.
Now my trusty pal is running CentOS 6.4 while sitting quietly in a corner next to the printer, serving as an internal Linux server. This is great for testing and automated backups – and in the same spirit as playing with a Raspberry Pi (in a much neater battery powered package).
Refreshing the NC10 wasn’t a picnic though, and some of the steps are rather involved. Here are my notes, in case I either have to do it again or you want to follow along.
Prerequisites
We need the following ingredients, apart from coffee and sandwiches:
- 1x Samsung NC10 – working order (all data will be wiped, this is the time to make a backup of anything you want to keep)
- 1x USB Stick, 1GB or greater
- Ethernet Cable to your router and internet connection
- a couple of hours uninterrupted time
- patience
Getting the Software

For this adventure we need the correct version of CentOS. The Intel Atom processor in the NC10 does not support 64bit so we’ll use the 32bit version of CentOS – the latest version at the time of writing in May 2013 is CentOS 6.4.
You won’t be able to download the software from The CentOS project directly – instead check out the list of public mirrors and pick one in your area. I’m in Miami Beach so I chose one from the friendly guys over at Mojohost not far away from me.
You can download the files via HTTP or FTP, both will work in your favorite web browser. FTP will also work in FileZilla: just copy the relevant address into the Quick Connect host box and start downloading.
Once connected navigate to the following path:
/centos/6.4/isos
In here you’ll find two directories: x86_64 and i386 – these are the 64bit and 32bit versions respectively. Since we need the 32bit version we’ll choose the latter. These are the main files you may find useful, depending on how you’d like to install CentOS:
- CentOS-6.4-i386-bin-DVD1.iso and DVD2.iso – full DVD images, a total of about 7GB
- CentOS-6.4-i386-netinstall.iso – 200MB to download, but requires a working and configured internet connection during installation
- CentOS-6.4-i386-minimal.iso – slightly bigger with 315MB, but gets you a running system with a rather small file and no need for an internet connection
All I want from my NC10 is to be a remote server, so I don’t need a graphical user interface and hence I chose the latter. If you want the full GNOME version with all desktop bells and whistles, download either the DVD images or choose the netinstall option.
Turning ISO Images into Bootable USB Drives
Burning those ISO images onto DVDs or CDs isn’t a problem – but creating bootable non-optical media from them isn’t that easy (nor obvious): The trusty Disk Utility on Mac doesn’t work, the manual method described by CentOS is not for the faint hearted, and the “easy solution” mentioned in the same article requires a working local CentOS installation.
Neither option was for me, so I moved on. Inevitably I stumbled upon the Unetbootin utility which promises to download CentOS and burn an SD card or USB stick in one fair swoop. Available for Mac, Windows and Linux. Sounds great!
Sadly though the Mac version doesn’t seem to do anything on Mountain Lion, so this wasn’t for me either – especially considering that I had already downloaded the file I needed. There had to be an easier option – and thankfully there was:
ISO2USB is a small utility by Alex Agranov and does exactly what it says on the box: write an ISO image onto an SD card or USB stick. It’s only available for Windows though, but since my NC10 still had that in more or less working condition I used it – and it worked very well.
I highly recommend ISO2USB, check it out at Sourceforge. If you don’t have a working version of Windows to hand, you may think of a virtual instance running on Parallels Desktop. Sadly however my Windows 7 version did not see the attached USB devices so I couldn’t use it for this purpose – but I admit that I didn’t try very hard to set those up. Perhaps you have more luck me.
NC10: Booting into something other than Windows
First of all: you cannot boot your NC10 from an SD Card, not without a BIOS hack at least. Let’s not go down that route, we’re busy people. Instead burn the above ISO image onto a USB stick you probably find lying around and pop it into your NC10.
Hold down F2 while switching the NC10 on to get into the BIOS. There’s not much to do here, even though I thought I could switch the boot order to make it recognize the USB stick. But that’s not how you do it.
Instead, hold down F9 while switching on your netbook and hey presto – you’ll boot from any USB port. If no stick is attached all you’ll hear is a loud squealing noise for about 2 seconds, followed by the NC10 powering down.
Upon success, you’re greeted by the CentOS installer screen. I chose the first option and the installation went ahead just fine.
Installing CentOS
It’s very straightforward, but there were two points that I thought needed a special mention: setting up your network connection and partitioning your hard drives. Let’s start with the latter.
Linux is a bit different when it comes to “having space” versus “creating a partition”. To us mortals a “partition” is just a chunk of space which ultimately turns into a drive letter. How and why we don’t really care about. As long as we can say something like “use EVERYTHING on the drive and turn it into the C Drive, go ahead and do it”.
The NC10’s 160GB hard drives comes pre-partitioned into two equally sized chunks, drive C: and D: – but I didn’t like those and wanted all my space consolidated into one chunk, or as close to that as possible.
See, Linux needs a “boot” partition and a “data” partition. Each partition can then me divided into “logical volumes” which in turn can be “mounted” and appear as standard folders. This is great for extending the file system across multiple drives and devices, but it makes it a bit trickier to setup.
I chose the option to “Use all available space” in the partitioning section, and as a result my file system now looks like this:
[root@nc10 home]# fdisk -l
   Device Boot      Start         End      Blocks   Id  System
/dev/sda1   *           1          64      512000   83  Linux
Partition 1 does not end on cylinder boundary.
/dev/sda2              64       19458   155777024   8e  Linux LVM

Disk /dev/mapper/vg_nc10-lv_root: 53.7 GB, 53687091200 bytes
255 heads, 63 sectors/track, 6527 cylinders
Units = cylinders of 16065 * 512 = 8225280 bytes
Sector size (logical/physical): 512 bytes / 512 bytes
I/O size (minimum/optimal): 512 bytes / 512 bytes
Disk identifier: 0x00000000

Disk /dev/mapper/vg_nc10-lv_swap: 2113 MB, 2113929216 bytes
255 heads, 63 sectors/track, 257 cylinders
Units = cylinders of 16065 * 512 = 8225280 bytes
Sector size (logical/physical): 512 bytes / 512 bytes
I/O size (minimum/optimal): 512 bytes / 512 bytes
Disk identifier: 0x00000000

Disk /dev/mapper/vg_nc10-lv_home: 103.7 GB, 103712555008 bytes
255 heads, 63 sectors/track, 12608 cylinders
Units = cylinders of 16065 * 512 = 8225280 bytes
Sector size (logical/physical): 512 bytes / 512 bytes
I/O size (minimum/optimal): 512 bytes / 512 bytes
Disk identifier: 0x00000000
This tells us that I have indeed two separate drives (/dev/sda1 and /dev/sda2), one being a very small boot drive, and the other being a larger data drive. But then we see three various volumes which have been created:
root, swap and home – all with varying sizes.
After the installation all this space is mounted into the following places, as shown by the df- h command:
[root@nc10 home]# df -h
Filesystem            Size  Used Avail Use% Mounted on
/dev/mapper/vg_nc10-lv_root    50G  862M   46G   2% /
tmpfs                                                  498M     0  498M   0% /dev/shm
/dev/sda1                                          485M   49M  412M  11% /boot
/dev/mapper/vg_nc10-lv_home  96G  188M   91G   1% /home
For us humans, we’ll end up with the following folders:
- / (root directory, 50G available)
- /home (91G available)
- and a swap drive, currently 498M but unavailable for us to write onto
Linux does this so that all the operational things can be kept from data storage (in /home) – therefore if you accidentally fill up your server you don’t compromise running the OS.
If you feel that some of the 50G is better spent in the /home directory you can change this later – but for now this is the default configuration that CentOS sees as “use everything”.
Configuring the Network
On the screen that allows you to name your computer (the default is “localhost.localdomain”, but I’ve called mine “nc10”) there’s a small button which is easy to overlook the first time round: it’s called “Configure Network”.
Turns out it’s VITAL that you press it!
In it you’ll be able to configure ETH0 and WLAN0, two default network connections. If you don’t do this, then you’ll end up with no internet connection once the installation is complete. We’ll leave WLAN0 for now because we haven’t got the right driver yet.
Click ETH0 and tick the box that says “Connect Automatically”. Make sure that at this point an Ethernet cable from your router is connected to the NC10 and watch those little lights spring into action.
The rest of the installation runs smoothly until you’re asked to reboot the system.
Loggin in locally for the first time
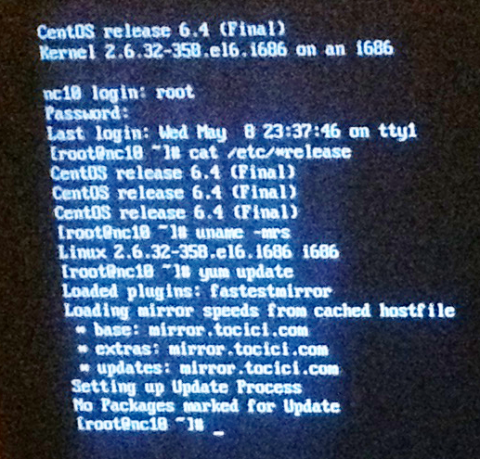
All the NC10 is going to display after its reboot is a local console screen, just like we love it from countless SSH sessions. This is great! Login as root and say hello to your new CentOS installation!
To test that everything is working, type something nice like
cat /etc/*release
This should bring up your current CentOS version. Next let’s check out network connectivity:
yum update
This should take a moment and come back with a list of packages that need to be updated. Go ahead and do this if you have a moment. If this command comes back very quickly with an error message, then it’s likely that your network connection isn’t working properly. Let’s hope that’s not the case though 😉
Loggin in remotely
Before you start to talk to your NC10 from another device via SSH we need to know it’s IP address on the network. By default this is configured dynamically, so every time you turn off your NC10 it may be a different one – unless you tell your network configuration otherwise.
Still logged on locally, type in the following command:
/sbin/ifconfig
This will come back with a list similar to this one:
eth0      Link encap:Ethernet  HWaddr 00:13:77:D4:DA:D0
          inet addr:192.168.1.234  Bcast:192.168.1.255  Mask:255.255.255.0
          inet6 addr: 2602:306:cd83:aad0:213:77ff:fed4:dad0/64 Scope:Global
          inet6 addr: fe80::213:77ff:fed4:dad0/64 Scope:Link
          UP BROADCAST RUNNING MULTICAST  MTU:1500  Metric:1
          RX packets:136409 errors:0 dropped:0 overruns:0 frame:0
          TX packets:36952 errors:0 dropped:0 overruns:0 carrier:0
          collisions:0 txqueuelen:1000
          RX bytes:91070263 (86.8 MiB)  TX bytes:3285128 (3.1 MiB)
          Interrupt:18

lo        Link encap:Local Loopback
          inet addr:127.0.0.1  Mask:255.0.0.0
          inet6 addr: ::1/128 Scope:Host
          UP LOOPBACK RUNNING  MTU:16436  Metric:1
          RX packets:12 errors:0 dropped:0 overruns:0 frame:0
          TX packets:12 errors:0 dropped:0 overruns:0 carrier:0
          collisions:0 txqueuelen:0
          RX bytes:1008 (1008.0 b)  TX bytes:1008 (1008.0 b)
Notice the second line that reads inet addr, followed by your IP address.
Go grab any device on the same network and connect with your favorite SSH client (Terminal on Mac, PuTTY on Windows, or Prompt on your iPad/iPhone) using the following command:
ssh root@192.168.1.234
obviously using your own IP address and password when prompted. Now you can close the lid on the NC10, supply it with a power source and start treating it as a proper remote server.
Lovely – it’s working. Now what do I do?
Here are some of the cool things you can do with your new NC10 Server:
- install MySQL and run your own database server (as discussed here)
- import some databases and use your NC10 Server as a local backup to a remote server
- install Apache and run local instances of WordPress
- setup a cron job or two and backup files regularly
- install Plesk and do some testing
- repartition the hard drives
The fun never stops when you have your own free server within arm’s reach.
Have fun!
Further Reading
- Samsung NC10 on Wikipedia
- List of CentOS Mirrors
- ISO2USB Homepage on Sourceforge
1 thought on “How to install CentOS 6 on a Samsung NC10”