 You can never have enough servers flying around, be that for testing, playing or developing. Today I decided that I wanted my local copy of CentOS on my Mac Book Pro – and thanks to Parallels Desktop I can run this in a virtual container alongside Mac OS X. Nice!
It’s a bit complex so I took some notes – may they be useful for both you and me at some point in the future.
I’m installing CentOS 6.2 in 64bit on OS X Lion on a 13″ Mac Book Pro with 8GB of RAM and an Intel i7. I’m using Parallels Desktop 7 for this exercise.
Installing Parallels Desktop
 You can get a free trial version of Parallels Desktop and see if it floats your boat. You can download it here: http://www.parallels.com/products/desktop and install it. They’ll email you an activation code. Pop it in and you’re good to go.
Since this product is geared towards people wanting to run Windows on their Macs its emphasis is on you either buying a copy of Windows through the interface, or installing a copy from disk. There are also quick links to other Linux distributions on the bottom, none of them are CentOS though.
So we’ll choose option 2 (i.e. Install Windows from a disk or image) and choose an ISO image we’d like to install. This will be the netinstall.iso file we’re downloading in the next step.
Downloading the CentOS installer
Next we’ll want to get hold of an autoinstaller for CentOS. In version 6 this process has changed compared to previous versions. We’ll want to first download a file called netinstall.iso from any of these CentOS mirrors, like this one for example:
http://mirror.flhsi.com/centos/6.2/isos/x86_64/
As CentOS versions get updated, the actual link to the mirror will change and may not work anymore. It’s always best to pick your own mirror from the CentOS Mirrors List
I’m sure you can start the installation straight from a URL but I haven’t tired this. Once the file is downlaoded, choose it from the Parallels Desktop Installer and it will create a new virtual container. Then the installation begins.
Parallels Desktop will give you the opportunity to configure the container: how much RAM, how much hard drive space, etc. Go with the defaults here, or ramp up the RAM if you have it. I went with 2GB for now, but depending on what you’d like to do with your environment you may want to increase this a little. Make sure you leave some room for your actual Mac OS of course…
Installing CentOS virtually
Once the installer runs, choose to “install a new system or update an existing one”. You’re then promted to select where the installation files are. Choose URL and continue. Soon the installer will ask you “where is the rest of the files”? Give it your mirror URL to make it happy. To stick with our example it would be this one:
http://mirror.centos.org/centos/6.2/os/x86_64/
It can now download everything else it needs automatically. The next question you’ll be asked is about special storage systems. Go with the first option and click OK.
Next up is “what shall I do with the files on this hard drive”? Remember this is all virtual so deleting all files doesn’t meant your Mac HDD gets wiped. Select “delete all data” (the default) and you’ll still be OK. Trust me on this…
Once you’ve chosen your root password and timezone, you’ll have to decide what kind of system you’d like to run here. Your choices are minimal system, web server, virtual host, development machine and some others. I chose virtual host because I’d like to use this system just as I use my remote servers. The main difference here are the installed services and the absence / presence of the GUI.
If you’re not sure, remember that you can install as many virtual machines as you have hard drive space available – and you can just as easily delete / clone / backup / restore the ones you’ve created. Don’t be shy, try them all (if you have the time).
Once you make your decision, installation is under full way and can take about 20mins. Grab a cup of tea and come back to be greeted by a prompt to “reboot your machine”. Let’s do that.
Hello CentOS!
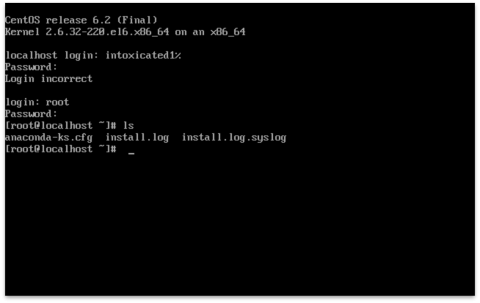
After the reboot, your system will greet you with a black login screen, just the way we love it from our Terminal or PuTTY application. Log on as root and hack away.

Further Reading
These articles have helped me in my journey to local CentOSness:
- http://scottlinux.com/2011/07/17/centos-6-netinstall-url/
- http://steveswinsburg.wordpress.com/2011/07/12/centos-6-remote-net-install/
- List of CentOS Mirrors at http://centos.org
- Download Parallels Desktop for Mac

Hi Stephen, I know what you mean – I also had trouble getting that GUI to work. As with many things in Linux, there’s always some hidden way to activate something retrospectively that hasn’t been installed. In case of the GUI however, it depends which type of installation you chose. I believe that “minimal” does not install the GNOME component (which is the GUI) – but the “full” option does. Sadly I don’t know how to turn one into the other… sorry!
What I would do is to start the installation again and then choose the “full installation”, I believe it’s the first option. IF all goes well, your machine should then automatically boot into the GUI.
Good luck 😉