
I really wanted to use the new WordPress TwentyThirteen theme over on my other site http://www.versluis.com. But I didn’t like the idea of using the default header images.
Since my previous theme had random header images, I thought it would be great to tap into the now built-in function and prepare a child theme that overrides those existing header images with my own. Here’s how I did it:
- first we’ll create a child theme
- then we’ll remove the existing header images
- and add our own images
As a final touch I’ve tweaked the site title font and gave it a Photoshop-like outer glow, all in CSS. Let me talk you through it step by step.
Creating the Child Theme
I’ll start by creating a new folder inside wp-content/themes/ – you can call it anything you like. I’ll call mine versluis2013, nicely matching the title of this new child theme. Inside this folder I’ll a single file named style.css, adding these lines at the top of the otherwise empty file:
/*
Theme Name: Versluis 2013
Theme URI: http://www.versluis.com
Author: Jay Versluis
Author URI: http://wpguru.co.uk
Description: Child Theme for TwentyThirteen
Version: 1.0
License: GNU General Public License v2 or later
License URI: http://www.gnu.org/licenses/gpl-2.0.html
Template: twentythirteen
*/

@import url("../twentythirteen/style.css");
I’m sure you’ll familiar with all this, I’m just adding it here for completion. This tells WordPress that a new theme is in town and that it requires the TwentyThirteen Parent Theme. The last line imports all CSS rules from the parent so we can override it.
Head over to Appearance – Themes and activate your new child theme. Right now it’ll look exactly like TwentyThirteen. Check out the Header section and find these three default images:

Removing the default header images
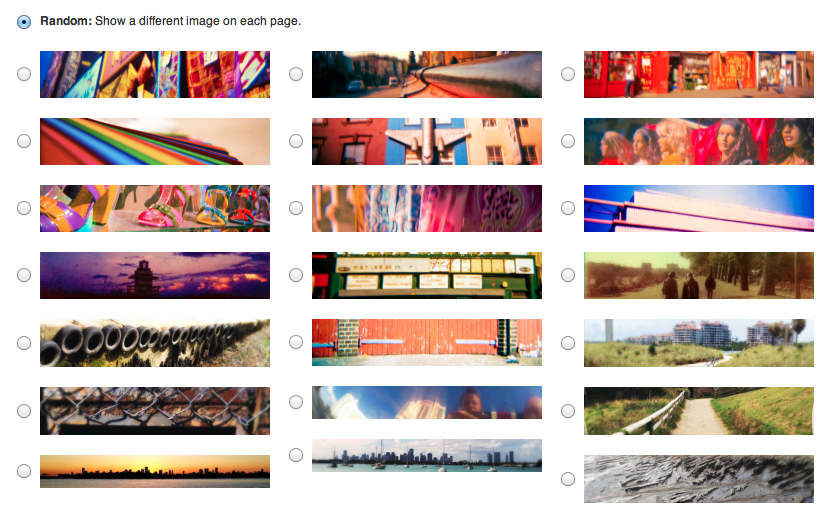
Even though nice, we need our own. This is simple if you only want to display a single header image: just upload it as the theme suggests, and you’ll be done with it. I however would like to use the Random option and display a different header image when the user refreshes the page.
Note that the Random option doesn’t work upon refresh if the site is using a cache plugin. The header will only be randomised once the cache is cleared!
To remove the default headers we need two things:
– give our Child Theme a functions.php file
– know what those headers are called in the parent theme
The latter point will be different for every theme you’ll modify. In TwentyThirteen those images are defined in /inc/custom-header.php – but that’s not a standard WordPress file. In fact, this is called from functions.php where it may also be defined, depending on the theme author.
In custom-header.php we find this bit of code:
register_default_headers( array(
	'circle' => array(
		'url'           => '%s/images/headers/circle.png',
		'thumbnail_url' => '%s/images/headers/circle-thumbnail.png',
		'description'   => _x( 'Circle', 'header image description', 'twentythirteen' )
	),
	'diamond' => array(
		'url'           => '%s/images/headers/diamond.png',
		'thumbnail_url' => '%s/images/headers/diamond-thumbnail.png',
		'description'   => _x( 'Diamond', 'header image description', 'twentythirteen' )
	),
	'star' => array(
		'url'           => '%s/images/headers/star.png',
		'thumbnail_url' => '%s/images/headers/star-thumbnail.png',
		'description'   => _x( 'Star', 'header image description', 'twentythirteen' )
	),
) );
}
add_action( 'after_setup_theme', 'twentythirteen_custom_header_setup' );
It tells us the name of the default images (circle, diamond and star), and it also shows us how to define header images too. Each item has a URL for the full image (displayed on the front page), and a thumbnail (displayed in the admin panel). It even has a description field.
TwentyThirteen is so well documented, you can learn a lot from this theme by just reading through the code. But for now, let’s remove those images.
I’ll create an empty functions.php file inside my versluis2013 folder, adding this:
// remove default headers - works with TwentyThirteen 1.1 (thanks, Gavin!)
function versluis2013_remove_default_headers () {
	unregister_default_headers (array('circle', 'diamond', 'star'));
}
add_action ('after_setup_theme', 'versluis2013_remove_default_headers', 12);
What we’re doing here is using he unregister_default_headers() function with the references we’ve learned about above (circle, diamond and star). This is wrapped inside a function and will be called once WordPress has setup the parent theme.
Save the file, then refresh your header section in the admin panel. Even though the large image on the top is still showing, those three thumbnails should now be gone. #result
Adding your own images
I’ll copy a folder called headers into versluis2013, inside which will be the header images I’d like to use. They’re conveniently called header_1.jpg, header_2.jpg, and so forth. Size doesn’t matter that much here, but if you keep them at 1600×230 pixels they’ll be used as is. As long as you stick to that aspect ratio WordPress will do the rest, be that up-size or down-scale.
Here’s how we define our own headers:
function versluis2013_add_headers () {
	register_default_headers( array(
		'header1' => array(
			'url' => '%2$s/headers/header_1.jpg',
			'thumbnail_url' => '%2$s/headers/header_1.jpg',
			'description' => __( 'Header 1', 'twentythirteen' )
		),
		'header2' => array(
			'url' => '%2$s/headers/header_2.jpg',
			'thumbnail_url' => '%2$s/headers/header_2.jpg',
			'description' => __( 'Header 2', 'twentythirteen' )
		),
		'header3' => array(
			'url' => '%2$s/headers/header_3.jpg',
			'thumbnail_url' => '%2$s/headers/header_3.jpg',
			'description' => __( 'Header 3', 'twentythirteen' )
		)
	)); // end of array
} // end of main function
add_action ('after_setup_theme', 'versluis2013_add_headers');
Just like we’ve learned from TwentyThirteen, we’ll create a function with a unique name, then define our header images.
You may be unfamiliar with the %2$s inside the URL fields (I know I was). That’s a placeholder for URL to your child theme, no matter where it’s installed. %s is another placeholder which is the URL to the parent theme. If ever you need to reference an asset within your child theme or the parent theme, it’s easy to add the asset’s file name to the end of this placeholder.
The URL to my main image and my thumbnail is the same, feel free to use a smaller image for the thumbnail though if you prefer. It means the admin interface will load a bit faster. Get creative with the description too if you like.
The ‘twentythirteen’ parameter is what’s known as the text domain. We’re not using it here, but it gives translators the option to translate your descriptions.
You can add as many header images as you like before you close out the array. Careful with excess command – make sure the last element in the array does not have a comma before the closing bracket.
Refresh your admin interface again and see those headers appear. Select the Random option, head over to your front page, and every time you refresh the page a new header image should greet you. Neat, huh?
Adding a fuzzy glow to the site title
The problem with random header images is that white text may not always work with a changing background. The same goes for black text. What I’d do in Photoshop is I’d apply a drop shadow or perhaps a glow so that the text separates from the background better.
Thanks to CSS we can do something similar and apply a fuzzy border. I’d like this around both my site’s title and my site description, so I’ll target them both like so (in style.css):
.site-title, .site-description {
	color: #FFF;
	text-shadow: 0 0 0.5em #000, 0 0 0.2em #000, 0 0 0.2em #fff, 0 0 0.2em #fff;
}
.site-header .site-title:hover {
	text-decoration:none;
}
The first block applies just that. Notice that the same thing is applied several times in a row, twice with a black background, and twice with white. It just makes the glow come out more.
Bert Bos explains the intricate details here: http://www.w3.org/Style/Examples/007/text-shadow.en.html, he’s the Style Activity Lead over at W3 – I love reading his simple yet detailed explanations.
The second block simply removes the underline when you hover over TwentyThirteen’s site title.
Adding a custom font to the site title
The last thing I did was change the site title from the default Bitter font to something else. Again, CSS in 2013 makes this possible – and actually has done since 2005, I guess now all major browsers have caught up and let us use those tricks reliably.
I want to use a font called Old Typewriter, you can get it from here: http://www.dafont.com/old-typewriter.font. Once unpacked, I’ll copy the Old-Typewriter.ttf file into my child theme’s directory, then reference it via CSS like this:
 @font-face {
	 font-family:"OldTypewriter";
	 src:url(Old-Typewriter.ttf)
 }
 .site-title {
	 font-family:"OldTypewriter";
	 text-transform:uppercase;
 }
This defines a new font which can then be a applied just like any other font to the .site-title class. While I’m there, I’m also changing the font to use all uppercase letters.
And that’s it!
I hope you enjoyed this little tutorial, now go forth and create your own funky child theme of TwentyThirteen!
many thanks Jay, I was simply missing ‘/images’ before ‘/headers’; I’d assumed that %2$s was in some way recursive, so I just needed to explicitly specify the file location within the theme.
Thanks for the tutorial, this is exactly what I wanted to do and it worked perfectly. Thanks to Gavin and paulopitz137, they had the two errors I did, and their fixes worked great.
The fuzzy glow and no underline were nice bonuses also! Interestingly, they do not show up on the preview screen. How would one make those effects show on the preview?
I am new to WordPress and will definitely be checking back here.
Hi Mike, glad it was useful. Yes I’m wondering why the preview is only an “almost” preview – I’m not sure why it doesn’t show the glow. It works fine once the theme is activated.