 With the WiFi card on my NC10 enabled, I struggled to connect to my actual WiFi network from the command line (WPA2). After an entire day of research, trial and error I had to admit to myself that setting this up on a minimal CentOS 6 installation is simply beyond me.
Likewise, monitoring the levels of my new battery had me greatly puzzled.
But those two points aside, I also wanted to install a Desktop type environment on my NC10 so it would be more useful – now that it has a new battery and all.
As it turns out installing GNOME – almost as a side effect – will take care of both those problems in a flash: easily connecting the NC10 to my WiFi network, monitoring my battery, and so much more.
Let me show you how I did it.
My machine has a minimal CentOS 6.5 installation on it and I’ve installed the Atheros driver as explained in my previous article. I’m on a wired network connection to install the additional GNOME packages.
yum groupinstall
I didn’t know this but yum is even more magical than I always thought: not only can it install single packages and resolve their dependencies; yum can also install entire sets of packages called groups.
To see what’s available type
yum grouplist
This will show you a huge list of available and installed groups. We’re interested in the following:
- Desktop
- Desktop Platform
- X Window System
- Fonts
- Internet Browser
To install all those without being asked for every group, type
yum -y groupinstall "Desktop" "Desktop Platform" "X Window System" "Fonts" "Internet Browser"
Since groups can have spaces in their names it is necessary to put them into “quotes” . Once issued, yum will go to work. This will take some time so let’s grab coffee.
Thanks to the Vagabond Geek and Jeff Hunter for the above info.
Using GNOME by default
Now that my NC10 is more of a laptop rather than a remote web server, I like the idea of booting into the desktop environment by default. To do this tweak a single number in /etc/inittab:
// to edit the file
vi /etc/inittab

// change this line
id:3:initdefault:

// to
id:5:initdefault:
Above this line you’ll see an explanation of what each ID will do at boot time. Realistically you’ll only ever need to worry about 3 and 5. Save the file and restart your system – and upon next boot you’re prompted to create a new user, or login with existing credentials.
Change it back anytime you like.
NC10 – meet GNOME
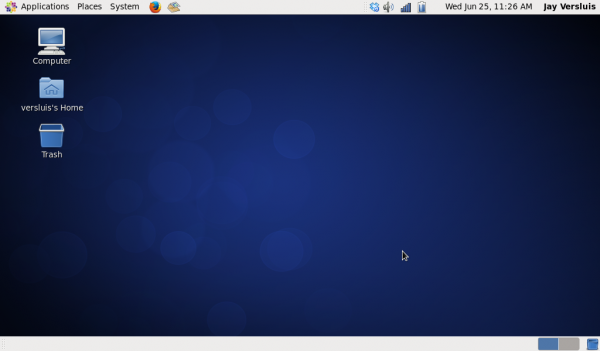
I had looked at GNOME many years ago on an old and long retired slow Sony Vaio laptop – and was surprised how relatively slick it runs on the NC10’s underpowered hardware.
To my surprise things like the integrated Samsung Function keys for screen backlight and volume were working out of the box without the need for additional drivers or patches! Just like the touchpad – it just works. Same with monitoring my battery level.
Bravo, CentOS! Here’s what the NC10 looks like running GNOME:

Connecting to your WiFi Network
GNOME isn’t all that different from other desktop OSes and reminds me of Windows and Mac OS X. You connect to your local network simply by clicking the “antenna” type symbol at the top of the screen, pick your network from the list and enter the password.
If you’ve ticked the relevant box, you’ll be connected automatically on subsequent logins.
Why CentOS on the NC10? Why not use Windows?
My NC10 came with Windows XP back in 2009 when I first bought it – because Vista was such a joke and nobody wanted it.
Later models of the NC10 came with Windows 7, but 2GB of RAM are highly recommended – and mine only has 1 GB. “Recommended” doesn’t mean that the experience is going to be great though. Windows 8 isn’t even an option on the NC10.
But more importantly, XP is has ended extended support in April 2014 – and Windows 7 is going to exit mainstream support in January 2015. At the time of writing that’s in 6 months.
CentOS 6 will be around until 2020 and copes extremely well with the NC10’s hardware.
I’m confused: X11, GNOME, KDE… what’s all this?
You and me both, brother! As I understand it, GNOME and KDE are both desktop systems that show you a graphical user interface (GUI) – much like Windows and Mac OS X. They both look slightly different and are developed by different teams.
X11 is the actual engine that allows apps to interact with content in windows. This wasn’t always the case, especially in the early age of computers which were text and column based. X11 is a breakthrough and allows for processing to happen on a remote machine, while graphics are rendered on the local system.
As with many things in Linux, you have a choice of which GUI you’d like to run: GNOME or KDE. You can even install both on your system and boot into the one you fancy:
yum -y groupinstall "KDE Desktop"
Or, from GNOME, head over to System – Administration – Add/Remove Software and search for KDE, then install it from there.
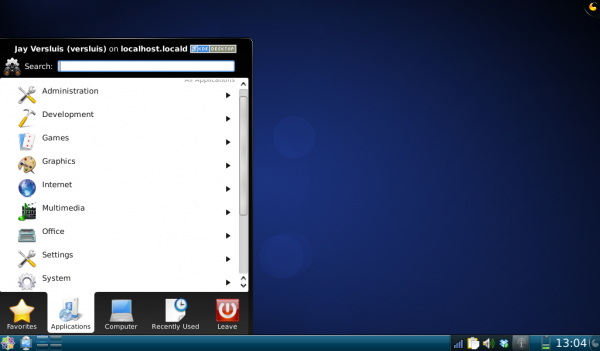
Once the install is complete, log out (top right) and log back in, selecting your desired interface from the drop down at the bottom. Here’s what it looks like on the NC10:

Both systems get the job done and it really comes down to personal preferences and needs.
GNOME is a more “barebones”, while KDE contains accessories like a calculator, games, different web browser and a whole lot of other stuff by default.
I found that on the NC10 I much prefer GNOME over KDE – perhaps because GNOME reminds me of Mac and KDE of Windows. As I said, it’s really about personal taste.

In CentOS 7 the groups are different, but yum grouplist will still work and show you the relevant items. For example, to install GNOME on CentOS 7 you now need to use