
![]() You can update Plesk via the Web Interface (under Tools and Settings – Updates and Upgrades). However sometimes the interface times out, or browsers get confused – therefore it’s good to know that you can apply updates via the command line interface as well. In this article I’ll show you how (in Linux – I don’t know much about running Plesk on Windows I’m afraid).
You can update Plesk via the Web Interface (under Tools and Settings – Updates and Upgrades). However sometimes the interface times out, or browsers get confused – therefore it’s good to know that you can apply updates via the command line interface as well. In this article I’ll show you how (in Linux – I don’t know much about running Plesk on Windows I’m afraid).
We need to download the standard installer script for this. It’s a powerful little tool which can also be used to add or remove components from the current Plesk installation, or to install Plesk on a barebones server.
As of 2017 the link can be found here:
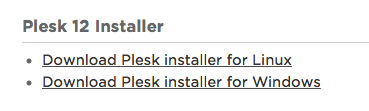
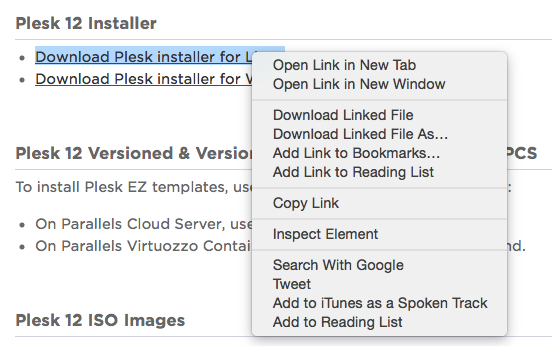
If you click the option “Download Plesk installer for Linux”, you’ll see the actual script open in a new browser tab. Not what we want, although you could copy and paste this into a new file on your Linux system. Instead, right-click on the link and choose “Copy Link” instead.
With that link in your clipboard, connect to your server via SSH and download the file with something like wget:
wget http://autoinstall.plesk.com/plesk-installer?long-url-here
This will result in a file called “plesk-installer” with some nasty parameters at the end, several hundred characters in total. Let’s rename it to something easier and tweak the execution permissions:
mv plesk-installer* plesk-installer
chmod +x plesk-installer
Now we can run the script like so:
./plesk-installer

Welcome to the Parallels Installation and Upgrade Wizard!
===============================================================================

This wizard will guide you through the installation or upgrade process. Before
installing or upgrading Parallels products, be sure to back up your data.

To start the installation or upgrade, press N and then press Enter.
To quit the installer, press Q and then press Enter.
Follow the instructions to upgrade Plesk. You can also call the script with several options, for a full list of those call it with “–help”. To see all available versions of Plesk during the installation, use “–all-versions”, which will eventually lead you to a screen similar to this:
Select the desired products and their versions
===============================================================================

The following product versions are available:

1. [*] Parallels Plesk
  2. ( ) Parallels Plesk Panel 12.1.21 (testing)
  3. ( ) Parallels Plesk Panel 12.1.20 (testing)
  4. ( ) Parallels Plesk Panel 12.1.19 (testing)
  5. ( ) Parallels Plesk Panel 12.1.18 (testing)
  6. ( ) Parallels Plesk Panel 12.1.17 (testing)
  7. ( ) Parallels Plesk Panel 12.1.16 (testing)
  8. ( ) Parallels Plesk Panel 12.1.15 (testing)
  9. ( ) Parallels Plesk Panel 12.1.14 (testing)
  10. ( ) Parallels Plesk Panel 12.1.13 (testing)
  11. ( ) Parallels Plesk Panel 12.1.12 (testing)
  12. ( ) Parallels Plesk Panel 12.1.11 (testing)
  13. ( ) Parallels Plesk Panel 12.1.10 (testing)
  14. ( ) Parallels Plesk Panel 12.1.9 (testing)
  15. ( ) Parallels Plesk Panel 12.1.8 (testing)
  16. ( ) Parallels Plesk Panel 12.1.7 (testing)
  17. ( ) Parallels Plesk Panel 12.1.6 (testing)
  18. (*) Parallels Plesk 12.0.18 (Stable) (currently installed)

N) Go to the next page; P) Go to the previous page; Q) Cancel installing
To select a version, type the respective number;
Select an action [N]:
If you call the script without any parameters, only micro updates and additional components are applied. Micro updates are usually applied automatically if this feature is enabled (it is by default).
If you’re updating from the command line, and you get a message like
it could mean that a previous update process is stuck. See if you can find it and kill it.
In addition, there’s a file called /tmp/psa-installer.lock. Remove it and start the installer again.