When I got a new WiFi router, I’ve retired my old AirPort Time Capsule from being my main network hub. One thing I was missing from my setup though was the network attached Time Capsule functionality so that my Macs can use it Time Machine backups. Turns out the Time Capsules actually have an option that lets them act as “sort of” NAS devices, without getting involved in creating network functionality, and it works great. Here’s how to do it.

Note that this will only work on a Mac, not with a Windows or Linux system. I’m not sure why, but only a Mac can connect as far as I know. While the setup is meant to be used with Time Machine backups, you can indeed store arbitrary data on either the internal or USB attached drive once connected, turning it into a neat NAS.
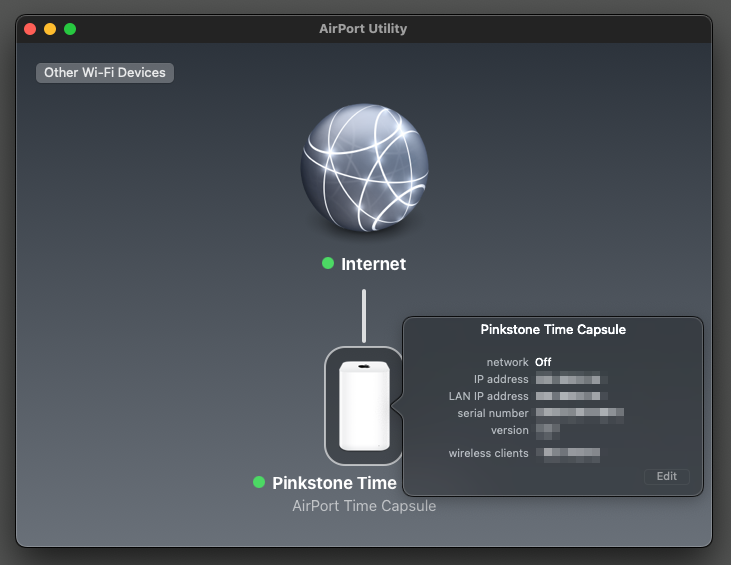
You’ll need the AirPort Utility to administer the Time Capsule. It’s available for Mac, iOS and even Windows.
Setup
First, power up your Time Capsule but don’t connect it to anything. All it’ll do then is to create the WiFi network so you can connect to it from your system. If this was previously disabled, connect only one computer but no external router at this point to avoid any routing issues.
Next, login to the Time Capsule using AirPort Utility. Click on the Time Capsule and select Edit.
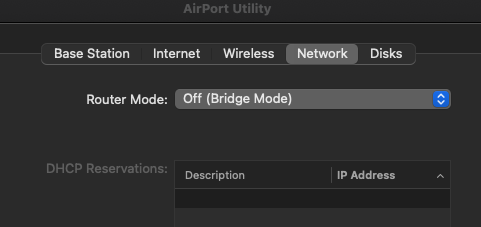
Under Network, Router Mode, choose “Off (Bridge Mode). This will let your Time Capsule join an existing network, if one were connected (we’ll do that in a moment).
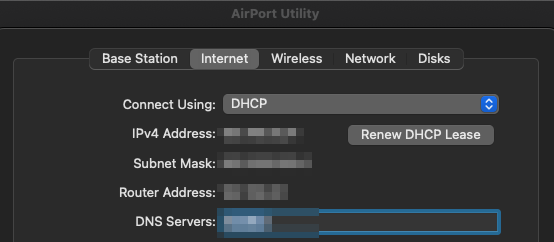
Next, under Internet, select DHCP so that when a network becomes available, it’ll choose a valid IP automatically. If you’re confident you can provide a static IP here too.
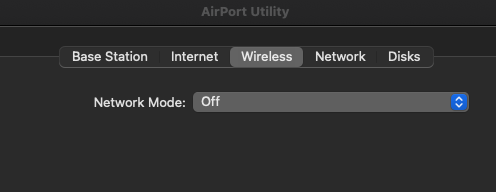
And finally, you can head over to Wireless and set the Network Mode to off. This will disable the wireless network that the Time Capsule can create. Note that this will only work if you’re connected via LAN. For convenience, I would leave it on for now until you know the NAS functionality is working.
That’s it! Close the menu and let the Time Capsule reboot. Now you can attach a LAN cable from your existing router to the WAN port. Make sure it’s CAT 5E at least so that your devices can connect at gigabit speed.
Connecting to the Time Capsule
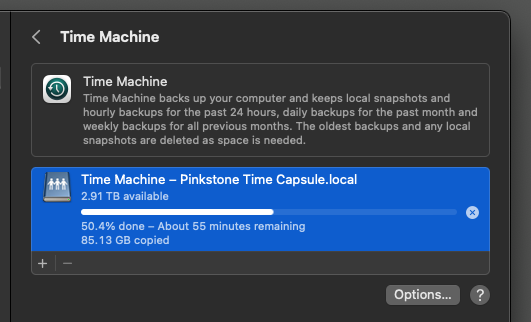
If you’re on a Mac and you want to use the device as a Time Machine backup destination, open Time Machine and add it as a disk. It should show up as a shared drive, alongside any attached USB drives.
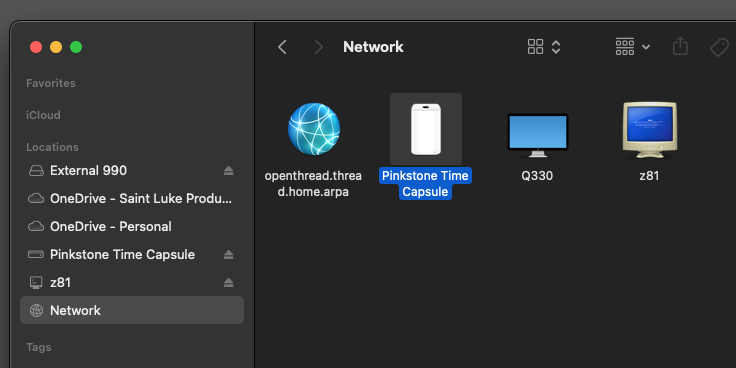
On a Mac, the Time Capsule is also accessible from the Finder under the Network section. Double-click the device and login with the credentials specified through AirPort Utility. Once logged in you’ll be able to store files on the internal and any external disks.
That’s it! I’m using the setup right now and it works great. I’m glad my old AirPort Time Capsule has a new lease on live. Apparently its internal disk is “server grade”, meaning it’s supposed to be operational for a cool million hours (or in excess of 114 years, and it will undoubtedly outlive me).