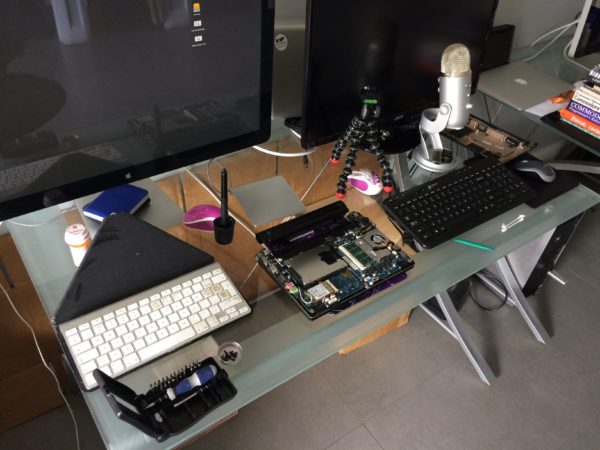
 My Samsung NC10 Netbook has been in constant operation since 2013, for 24 hours a day, 7 days a week. It’s doing a great job as our internal office server, purring along quietly running CentOS 6.
When I put it in operation 5 years ago, I made sure no mechanical parts we being used anymore to avoid wear and tear: I’ve added an SSD, and once a day valuable data is backed up on a permanently mounted SD card.
The only mechanical thing still in use is the internal fan. I knew the day would come on which the poor thing would either give up and need replacing, or at least require some maintenance to make it go a few extra miles. Well, that day has come at the beginning on this month, when I noticed a bit of rattling noise that started happening behind my big monitor. That’s where I keep the little guy.
Turns out that the fan can be easily whipped back into shape with a drop of bicycle oil. It’s really easy to disassemble too – let me show you how I did it.
Opening Procedure
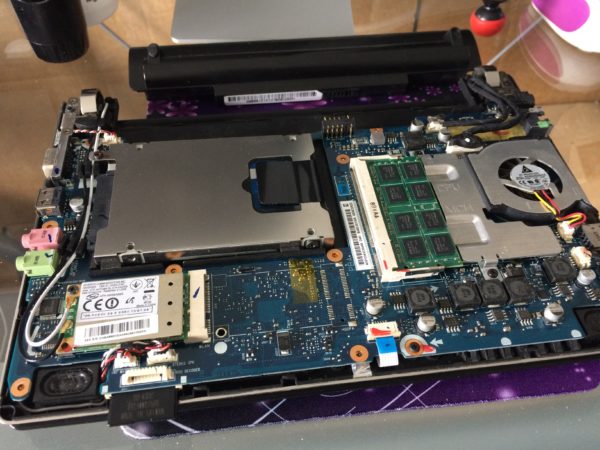
Before we begin, always shutdown the netbook and remove the battery and all peripherals (including the power cable).
The first thing I had to do to get to the inner workings of my little buddy was to open him up. I’ve done it many times before, but weirdly, I always forget the most efficient and safest way to do it. Here’s how it works best, as far as I can remember:
Remove all those little screws at the bottom with a Phillips head screwdriver. A PH1 will do nicely. iFixit sell a set for less than $20 that I had as part of a iPhone Battery Replacement kit. Very handy indeed.
Now comes the tricky part, namely prying open the two halves of the plastic shell without breaking it, or damaging any of the little plastic teeth that hold it together. The best thing I found was a little green spudger, also courtesy of iFixit. Insert it near a corner and go round the whole laptop until each plastic clip has come lose.
Then, with the VGA port facing left, start lifting the bottom case off on the right hand side, making sure it slides off over the VGA side of the board.
Removing the fan
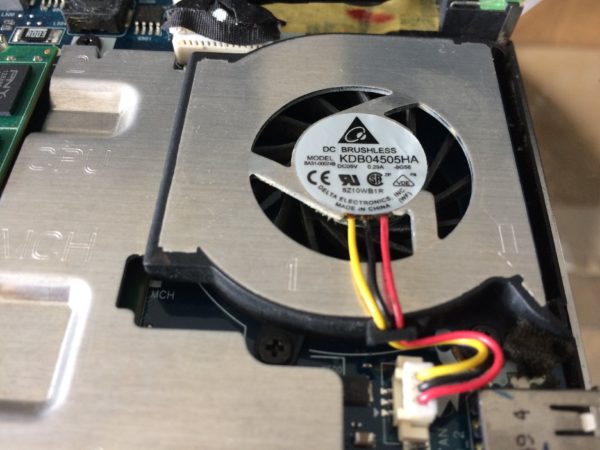
Here’s the fan, a DC Brushless, Model KDB 04505HA. Not sure if that’s important or not, or if these can be obtained separately. It’s attached to a custom made heatsink of sorts (the big silver thing in the picture).
Pop off the power cable here and remove the screws that hold the silver plate in place. There’s no need to remove the sticker on op of the fan: I did this thinking I could insert a bit of oil here, but there’s no access to the axle here. So leave it alone.
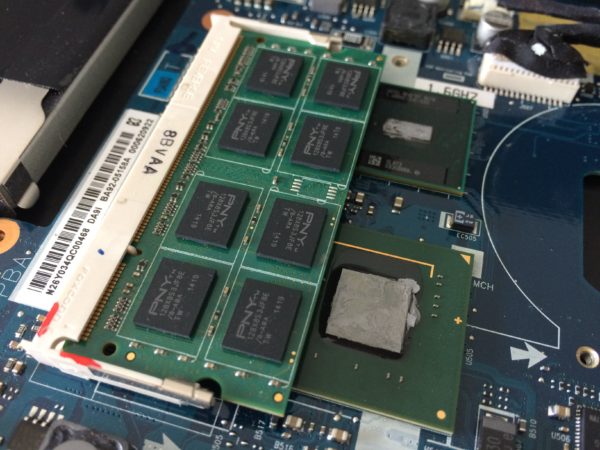
With the heatsink removed, we can see the two things that require cooling with this semi-efficient construction: the 1.6 GHz Intel N270 Atom CPU, codenamed “Diamondville” (the tiny thing at the top). It doesn’t look it, but it does sport a whopping 47 million transistors.
The somewhat larger chip labelled MCH at the bottom is the chipset that drives it. Both of these generate heat, and our (in-)efficient silver place attached to the fan makes sure it dissipates appropriately.
If you have some spare heatsink paste handy, wipe off the two chips and give them some new paste. I didn’t have any so I’ve left everything as it is here.
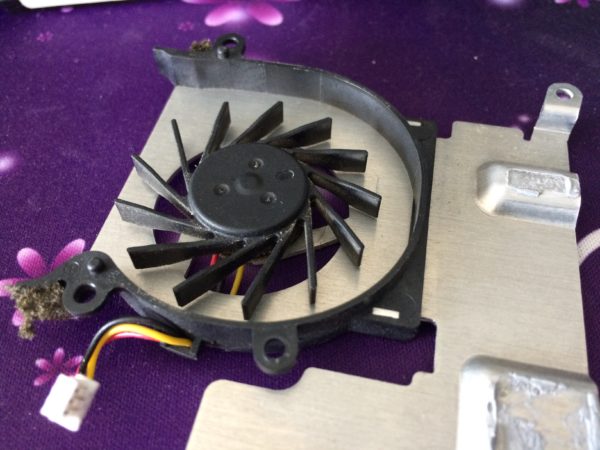
With the fan removed, we can see that it gathered a bit of dust over the years. That’s probably the reason for mine starting to make a racket, as I only recently dusted my desk and much of it was probably sucked in by the fan. Give it a good clean with compressed air while you’re here, along with other potentially dusty components.
Dust itself isn’t the devil in disguise. But if it spreads itself over any electrical components, it acts much like a thin jumper, keeping the little chips cosier than they should be. As a result they can overheat and die. So less dust is always better.
Lubrication
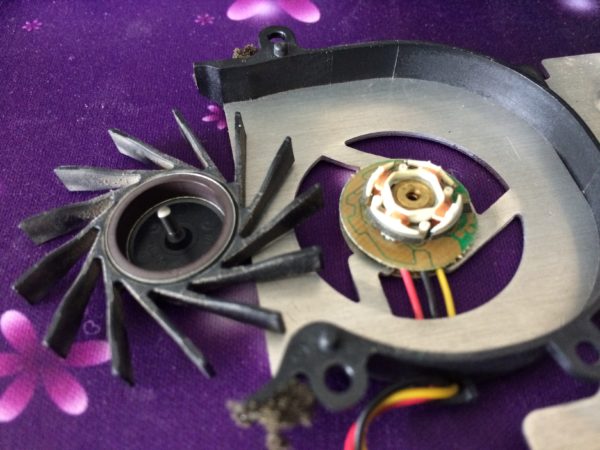
The only thing the fan is held in place with is the little silver axis. Turns out that to lubricate it, all we need to do is lift it up! It’s held in place with the magnetic coil surrounding its axis, which when induced with the right current from the spool on the heatsink will make the fan spin.
All we need to do then is dab a bit of bicycle oil on it. I’m using something called Tri-Flow, a “superior lubricant that penetrates and protects, made with P.T.F.E.” (according to the bottle). It’s about $5 in your local bike shop.
As they say, “a little dab’ll do ya”.
Any mineral oil will probably suffice here, but I wouldn’t recommend either vegetable oil from the kitchen, nor your old friend WD40. The latter does not lubricate well, even though it does fix squeaking doors.
I applied two drops of Tri-Flow with the help of a cotton bud, making sure no excess oil is leaking into any of the electronics. If the fan still makes a noise right after you attach it back on its axis, don’t worry: oil needs a few hours to penetrate the whole area. Leave it be for a bit and assess the situation later in the day.
Cue the silence (again)
After I did all the above steps, it was time to put my little buddy back together. I tightened the screws for the fan again, connected it, carefully replaced the plastic bottom (hooking it over the VGA port first), then squeezing the two parts together until they make a rather scary noise of plastic clicking together. It feels like you’re breaking it, and it always hurts a little bit to do that.
Add all the screws again, making sure you have no screws leftover! One of the things that happened to me (twice) was that I accidentally replaced the screws I thought were for the fan, but one or two in particular actually hold the heatsink in place through the bottom cover. So in effect one of the bottom cover holes was already filled with a screw that I had replaced on the inside. Just saying: double-check which screws need to be replaced on the heatsink before putting the bottom cover in place!
With all those mechanics back where they belong, my little NC10 is now silently doing its marvellous job again, quietly behind my my 27″ Thunderbolt display.
Here’s to another 5 successful years!
