
I wanted to access several EXT4 partitions on a dual-boot Fedora/Windows system from Windows to share storage space. One option I came across was to boot into Windows, then use WSL to mount these partitions and use them as if they were native drives. Did it work? I’ll leave that for another article (it got complicated). For now, here’s a little cheat sheet of how to get started with WSL in Windows 11.
What is WSL?
The Windows Subsystem for Linux (WSL) is a native Microsoft way to use Linux features directly from Windows. Technically I guess it should be called the “Linux Subsystem for Windows”, since that’s more what’s really happening, but who am I to argue?
WSL works natively in Windows 11 and works a bit like a virtual Linux machine, without the overheads of a fully fledged hypervisor. It needs to be installed though, and the processor needs to support virtualization.
Installing WSL
From an elevated command prompt, we can install all components with a single line:
wsl --installThis will add the components for WSL, including a default Ubuntu installation, but a restart is required before first launch. If you don’t do this, an error message appears and WSL can’t launch Linux.
To launch Linux, take a look at the Start menu and search for “Ubuntu”, then click on it and a familiar command line window should come up. This will prompt you to setup a Linux user name and password. That’s it! Now you’re rocking Ubuntu.
Several other distros are available from the regular command prompt, including Debian and Suse, and now even Fedora! This is the one I prefer, but it wasn’t available when I first tried WSL. Thankfully some nice people had made it available from the Microsoft Store for free or a small free (called “Fedora WSL” by Vineel Sai, and the “Fedora Remix” by Whitewater Foundry).
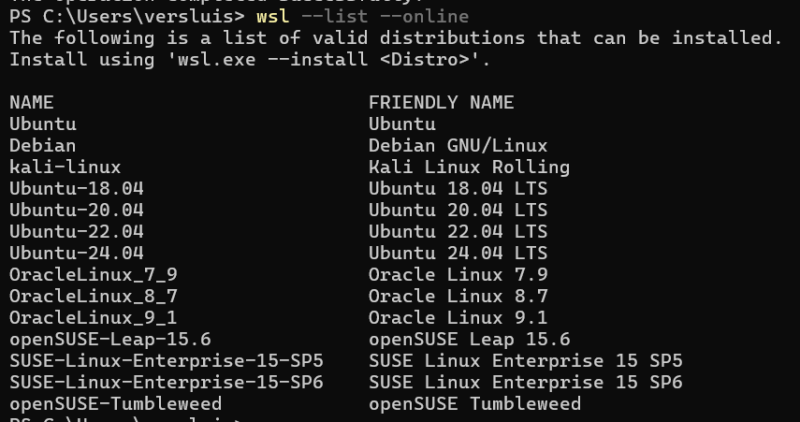
You can also install a distro via the command line by using
wsl --install --DistroNamewhere DistroName is something from the list of available images you can list with
wsl --list --onlineIf you have a preferred distro, you can make it the default with
wsl --set-default DistroNameLaunching WSL
One option is to use the Start menu and pick a distro from there. This will open up a terminal window, with your chosen distro running. Alternatively, we can launch WSL directly from Powershell. To launch the default distro, simply type this:
wslTo launch a particular distro that isn’t the default, we can use this syntax (using Ubuntu as an example):
wsl --distribution UbuntuShutting Down and Removing WLS
When we’re done working with WSL, we can shut it down with
wsl --shutdownShould that not work, we can also forcefully terminate our arrangement with
wsl --terminateWhen we’re done playing with a distribution (or if we’ve accidentally ruined it), it’s easy to remove it with
wsl --unregister DistroNameWSL Troubleshooting
On my laptop all of this worked as described on the first try, but on my HP Z840 workstation I had some issues and WSL didn’t want to launch. Turns out although my CPUs are Hyper-V compatible, the option was disabled in the security menu of the BIOS. Once enabled, all components installed fine.
I’ve diagnosed this by going into the “Turn Windows Features on and off” section, where one of the Hyper-V components was greyed out with the messages that the feature is disabled on my hardware. There’s a nice troubleshooting section on the official Microsoft Website for other issues.
Further Reading
- https://en.wikipedia.org/wiki/Windows_Subsystem_for_Linux
- https://learn.microsoft.com/en-us/windows/wsl/troubleshooting#error-0x80370102-the-virtual-machine-could-not-be-started-because-a-required-feature-is-not-installed
- https://answers.microsoft.com/en-us/windows/forum/all/how-to-fix-please-enable-the-virtual-machine/eed925f5-1b59-40b9-96a1-e318d1878907
- https://h30434.www3.hp.com/t5/Business-PCs-Workstations-and-Point-of-Sale-Systems/Enable-Virtualization-in-BIOS-how-to/td-p/8088471