
Even on the best computers there are some things you only do every once in a blue moon – at which point you’ve forgotten what you did last time to make it work. Setting up a second display with your MacBook is such a case. Here’s what worked for me when I installed my Thunderbolt Display last year. We’ve just added another one in our office – here’s to doing it again in the future.
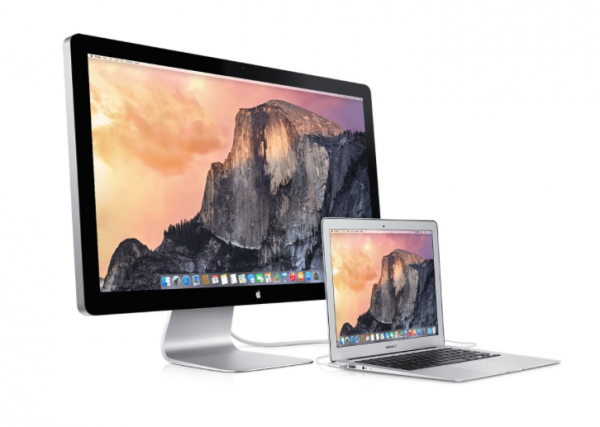
When you plug that beautiful 27″ puppy into your MacBook Pro or Air it works without any trouble: the dock is at the bottom of both displays, and even the menu bar seems to follow you onto whichever monitor you click. Magic!
Apps however remember which monitor they were launched on last, and if you’ve never had a second display attached to your system then most of them will default to that little laptop screen instead of your new desktop centre piece. This is not an issue if you simply close the lid on your laptop because your graphics card only sees a single display.
If you do use both displays though, there is a way to tell your Mac which one to launch an app on by default. And here’s how to do that:
Step 1
Under System Preferences, head over to Displays and select the Arrangement Tab. You’ll see something like this:
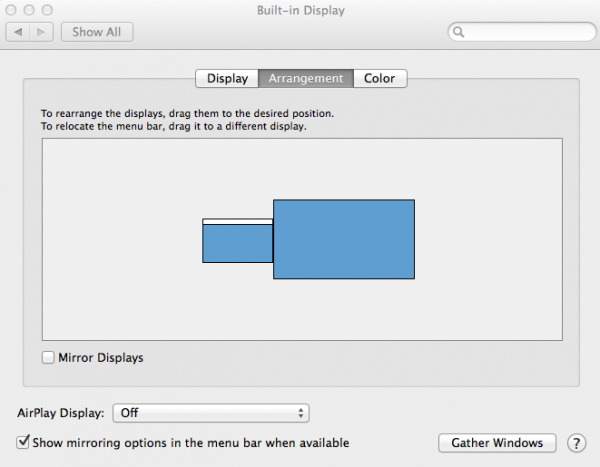
You may have even been here already to arrange the position of your displays. This works by dragging each display around to where they physically are on your desk – just in case you didn’t know. You do this by clicking into the big blue space there.
But did you also know that the thin white stripe at the top of the little monitor represents the default menu bar? It’s not exactly obvious, but you can click and drag it over from the small display to the big display and it’ll snap right into place – like this:
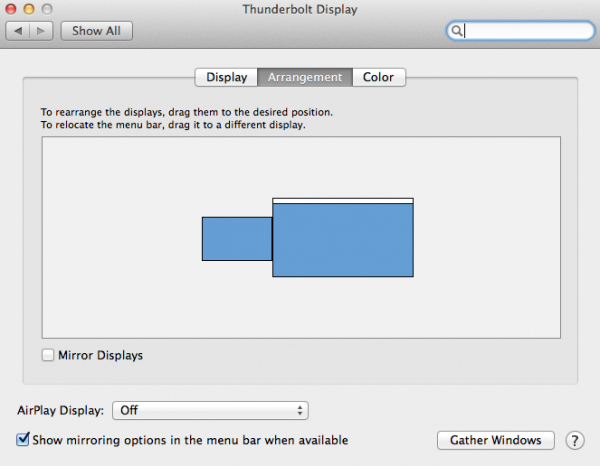
When you do this you’ll notice a bit of switching around on both monitors. This is a good start.
However, some apps may still open on the small display – even though you don’t want that. Turns out that with Mavericks, Apple made an adjustment to the way your Mac opens apps.
Step 2
Hover over one of your icons on the dock and select Options. A fly-out window opens which looks like this:
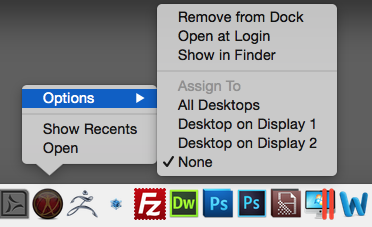
Take a look at the “Assign To” section. Here’s how it’s supposed to work:
- None (default) – your app opens as it does right now, remembering which display it was opened on last, and will open again next time it’s launched
- Desktop on Display 1/2 – force the app to always open on Display 1 or Display 2, no matter if you’re moving it
- All Desktops – your app will open on the display it’s launched from
Sadly, in reality, it just doesn’t work.
You’ll have to manually tell every app where and how you’d like to launch it, for example on Display 1 (in my case that’s the Thunderbolt display). Alternatively, with the default “none” option selected, launch an app and then move it to the display of your choice. Close it and re-launch it to see it open where you’ve left it.
This approach works on both Mavericks and Yosemite. If you ever disconnect your large display and use your laptop as a laptop, the apps open on your small screen as you would expect. When you re-connect your external monitor, apps launch on it rather than the small display.