
It’s easy to remote control your Mac, no matter if it’s hosted in a data centre far away, or if it sits in your bookshelf across the room. But when you do, you’ll notice that the screen resolution is often not what you’d expect on the monitor you control your Mac from.
This is a bit of a puzzle at first, because quite clearly the integrated graphics card can power various resolutions – including your 27″ Thunderbolt Display or your 1080p television set. Yet by default, OS X only volunteers very limited choices like the following:
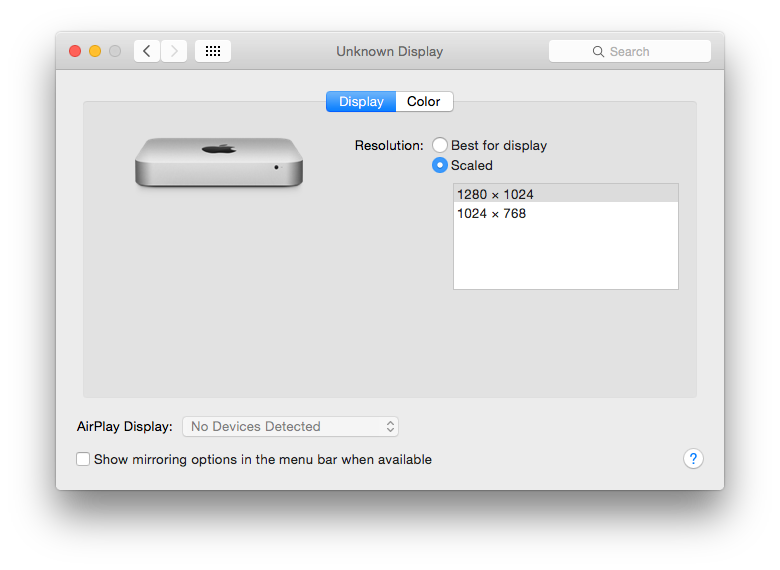
As a result, you’ll see a small inset picture surrounded by a whole lot of nothing on your local display.
So what can we do, if we don’t want to live with this?
Solution 1: Cheap and Nasty
One cheap and rather inconvenient way is to quickly connect the Mac in question to the display you’d like to view it on, wait until the resolution switches, and then quickly unplug that display again. The current screen resolution stays intact, so quickly remote into it and all will be fine.
Until you reboot the machine. Which sooner or later you’ll have to do.
You also need bring your Mac into physical proximity to your display, which is not only inconvenient but not always possible.
Sadly this approach doesn’t work on Laptops, as they will switch back to the integrated screen’s resolution the moment you unplug the display again. Thankfully there is a better way:
Solution 2: A Convenient Preference Pane
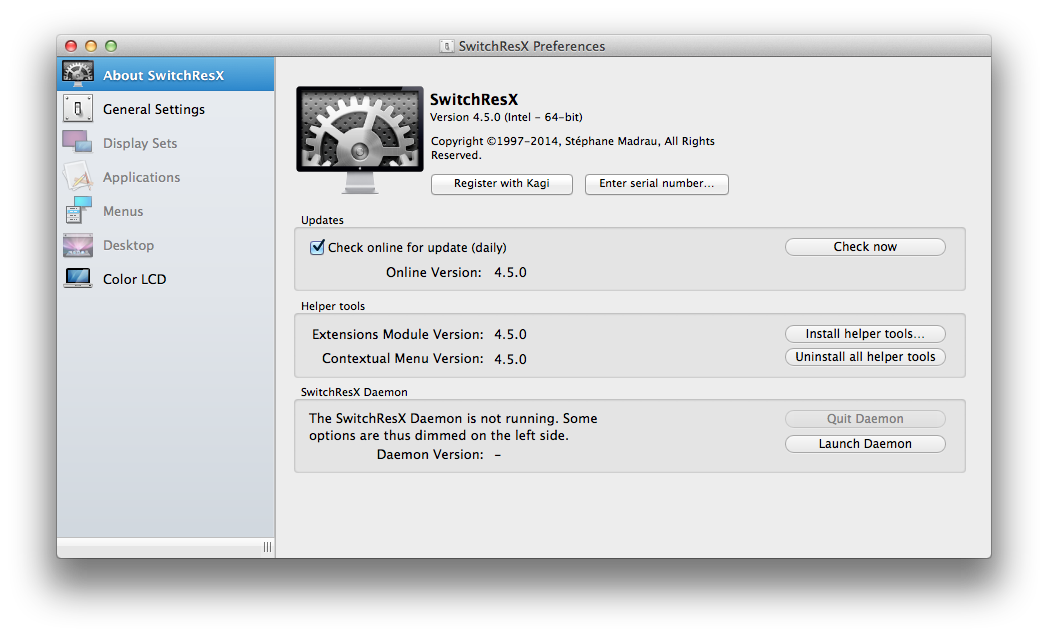
Install a small utility for $20 called SwitchResX by Stéphane Madrau. You can test it free for 10 days, and I think it’s worth the money (I’m not being paid to write this by the way).
SwitchResX will create a Preference Pane (under System Preferences – SwitchResX) which will let you set any resolution you like, no matter what display is or isn’t attached.
Here’s how it works
Say I wanted to remote into my 13″ MacBook Pro. By default the screen sharing would come back with a resolution of 1280×800 pixels. But my Thunderbolt Display has a resolution of 2560×1440 – and I’d like to see my MacBook remotely as if it appears when the display is attached directly.
Once installed, head over to
- System Preferences
- double-click SwitchResX
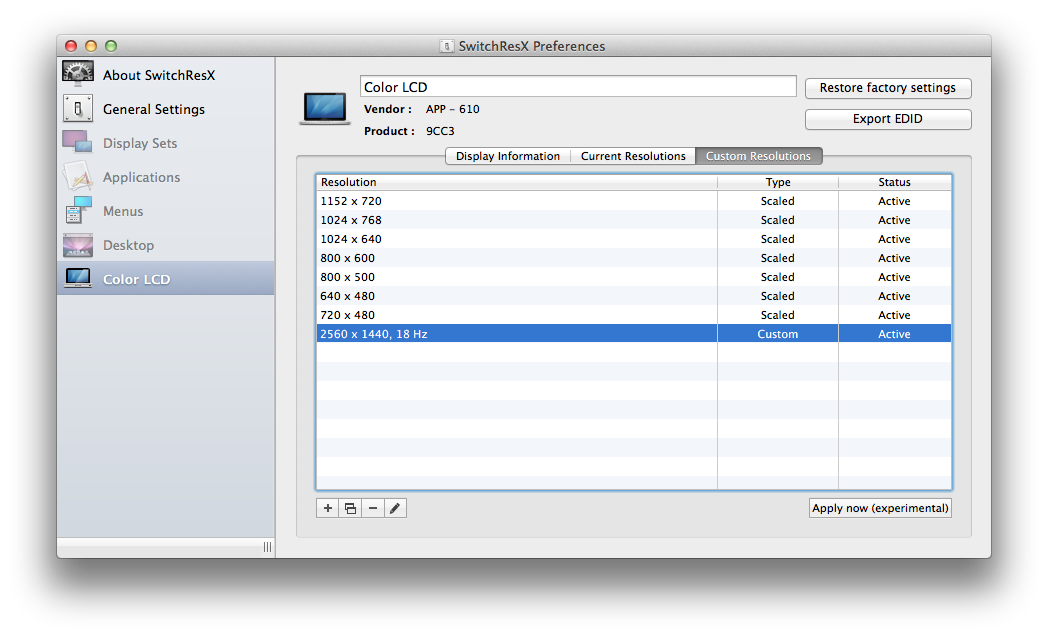
- select your Display (Color LCD in my case, it’s the last item in the left hand pane)
- select Current Resolutions and see if you find anything that matches your remote display
- or select Custom Resolutions and create your own
Save your values and you may be prompted for a reboot. When your Mac comes back, remote in again and see your new resolution in all its glory.
SwitchResX can do a lot more: for example, you can change your display resolution depending on which app you’re running. This comes in handy for certain graphic programmes, some of which look great in full screen mode – but sometimes the writing and tools becomes so small that you wish you could just change your screen to a lower resolution and give your eyes a rest.
Or think of screencasts and presentations which must match a certain resolution. The possibilities are endless!
Small Caveat
I’ve noticed one small snag in regards to remote connections which is what I’m using this tool for. The new resolution you set remains active even if you break your remote connection. That’s expected behaviour, and of course great if you remote in again at a later time.
But if you physically attach a different display which cannot cope with your custom resolution, all you’ll see is a blank screen. A laptop’s internal display for example doesn’t quite respond to anything higher than its default resolution.
As a quick workaround you can simply remote back into the machine and change the resolution back to something your display can understand. But if you forget, or if you no longer have remote access to the machine, this could become rather awkward.
Should this situation bite you, restart your Mac in Safe Mode (hold SHIFT during boot) which will start up in a default low resolution. Next head over to System Preferences – SwitchResX – select your display and click “Restore Factory Settings”.
The procedure is explained on the SwitchResX homepage too (in the FAQ section).
Hi
I have PURCHASED SwitchResX (which is fairly nice!) for my Mac Book Pro early 2011 – What I need is to have through ScreenSharing a resolution of 2560×1440 (supported by the actual screen (3840×2160)).
I arrive to add a custom resolution of 2560×1440 and to reboot. There seems nothing to do: This resolution is not applied. So it seems I purchased the app invane.
Any hints please how to get the resolution I want?
Regards
Fabio
Hi Fabio,
looks like you have exactly the same configuration as I have: 2011 MacBook, and you’d like to see it full screen on your Thunderbolt display. For me it works just as I described it above: create a custom resolution of 2560×1440, activate it, reboot the MacBook, and remote back in again. Voila: full-screen screen sharing. If this doesn’t work for you, and considering you’ve paid for SwitchResX, I would contact Stephane and see if he can help you. As I said, it works without a problem for me on the same hardware.
All the best,
JAY