

I’ve successfully installed Stable Diffusion on my local Windows rig! It’s been a little painful, and the process is likely to change over time, but here’s what worked for me. I’ll also share the start/stop commands below (because I’m likely going to forget by tomorrow).
Installation Steps
- install Git
- install Conda (it’s a package manager various languages)
- clone Lincoln Stein’s fork into a new directory
- download the Stable Diffusion data model (Hugging Face account required)
- create and start Conda environment (see Lincoln’s notes)
- extract the model into models/ldm/stable-diffusion (rename it to model.ckpt)
- start the “dream” script with web server
- dream up images!
Most of these steps can be found on the Lincoln’s GitHub Repo, so I won’t repeat them here verbatim.
Starting Stable Diffusion with Web Server
The “dream” script is the thing that translates text prompts into images. While this can be done on the Conda command line, it’s way easier to provide and change the parameters from the lightweight web server. Here’s how to do that:
- start the Conda command prompt
- change into the Stable Diffusion directory
- start the environment with conda activate ldm
- run python scripts/dream.py –web
- open a browser tab and view http://localhost:9090
You’ll see something like this:
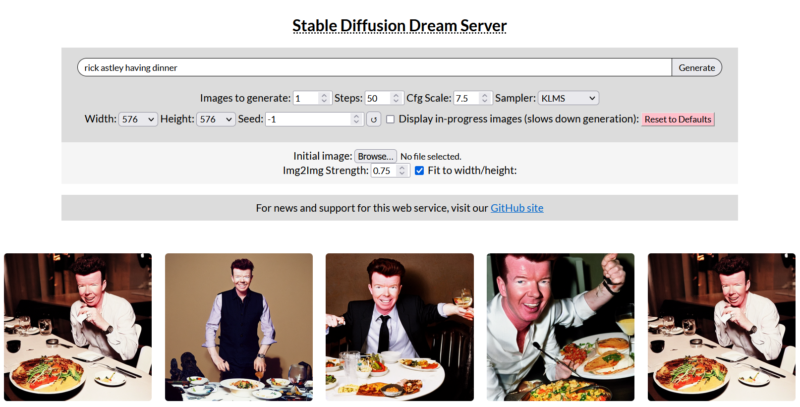
To close the web server, simply close the Conda command prompt and the service is shut down.
Further Reading
- Lincoln Stein’s Dream Script and Stable Diffusion Fork: https://github.com/lstein/stable-diffusion
- Stability AI’s original Stable Diffusion repo: https://github.com/CompVis/stable-diffusion
- Stable Diffusion Data Model: https://huggingface.co/CompVis/stable-diffusion-v-1-4-original
- How-to Geek’s Instructions: https://www.howtogeek.com/830179/how-to-run-stable-diffusion-on-your-pc-to-generate-ai-images/