
Step 3: Copy the bare repository to the remote server
You need SSH credentials to your remote server. Your root credentials will work of course, but ideally you would have setup another user. Let’s assume this is “gituser” for now, and that the URL to your remote server is mydomain.com. If that was the case, you’d type the following command to copy your new bare repo:
scp -r Testing.git gituser@mydomain.com:/path/to/your/directory
Substitute with your real path of course. You will be prompted for your password and if everything went well there’s no error message when the command is finished. The cursor just comes back as if nothing happened. That’s a good thing.
If you do encounter a problem, it’ll be either wrong credentials, a permission problem or a wrong path to where you’d like to save your repo.
But let’s think positive and assume that if you hear nothing bad from scp the command was successful.
Step 4: Connect Xcode to the remote server
Since you already have a working copy on your system, all you need to do now is tell Xcode (or rather Git) about the remote. To do that, open Xcode and head over to the Repositories (it’s in the Organizer) and find your project. It will be there only if it’s under local version control and has a local repository:
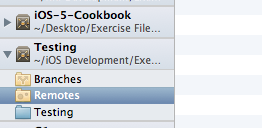
Click Remotes and find the plus button at the bottom to add a new one. This presents you with a new window:
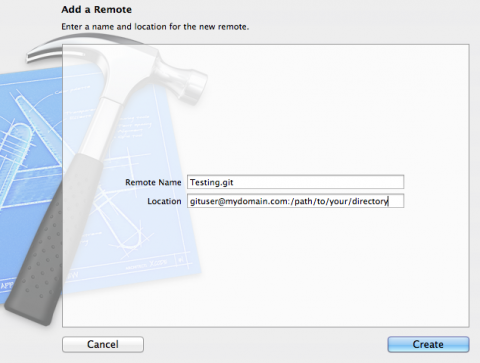
“Remote Name” is an arbitrary name for your convenience, just make sure it doesn’t contain spaces. “Location” is the full path to your new repo. In our example that is
gituser@mydomain.com/path/to/your/directory/Testing.git
Git is clever enough to detect the protocol you’re using, but if you wanted to make sure you can append the beginning of your path with ssh:// to force the protocol. Once you hit create… nothing happens. You don’t get to see if a connection would be successful or not until the next step.
Step 5: Pushing changes to your new remote
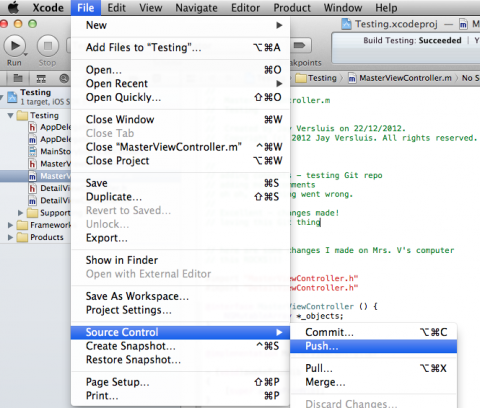
Since your new repo is empty you need to give it some data. You do that by opening your project in Xcode, and then heading over to File – Source Control – Push. If you have unsaved changes you’ll be prompted to commit those first.
This will bring up a new window in which Xcode (via Git) will now connect to your remote. If it is successful it will display it in a drop down menu, together with all remotes you have added to your local repo (yes, you can have more than one per project):
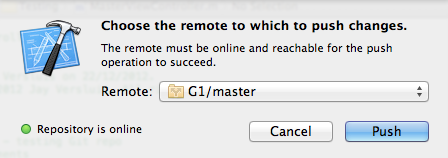
If you do not see any remotes then Xcode was not successful. Try adding your remote again, there could be any number of problems: wrong path, wrong credentials, etc. Sadly you cannot just edit your previous remote – you have to add a new one. It’s a tad frustrating, perhaps they’ll add an edit button in the future (or if there is an option to edit a remote, PLEASE let me know in a comment below).
Once you hit Push all your data is transferred to the remote repo and all is well. Now you can collaborate on code with others. Nice!
When you push changes in the future, you may find that somebody has already made changes in the remote. Xcode will duly notify you when that’s the case and ask you to perform a pull first. This will then synchronize your working copy first, and if necessary flag up any unresolved conflicts.
But what if I dont wish to make a new bare repository. Instead I wish to use the local .git file that is here: /%PROJECT FOLDER%/.git ?
Hi Jaro,
In that case, just head over to the Xcode Repository browser (in the Organizer) and click the little plus icon on the bottom left. You can add a local repository there.