
A while ago I made a video about how to use OBS Studio for Screen Recordings. If you’re new to OBS, I recommend watching it to see how this thing works. I’ve been meaning to make an update to this and explain how to switch from one scene to another, but since it’s a complex process I decided to write this article instead. It might be easier to follow in words and screenshots.
Scenes are collections of items that appear on your (captured) screen. They allow you to craft something you’d like to show to your viewers, for example your desktop and an inset of your webcam. From time to time you may want to show something else, such as a video, or your web cam in full screen, or a zoomed-in portion of your desktop. That’s where scenes can be helpful, because each scene can show something different. You can then seamlessly switch between them with ease.
Let’s take a look at how we can make such magic happen.
This one’s for you, Rod!
Where are those Scenes?
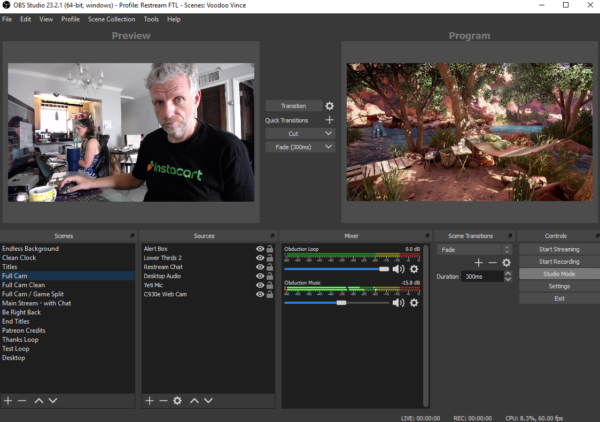
In your main OBS Studio window, you’ll typically find your scenes at the bottom left corner (unless you undock that palette). Here’s a quick screenshot from my OBDUCTION setup. Note how many scenes I have down there.
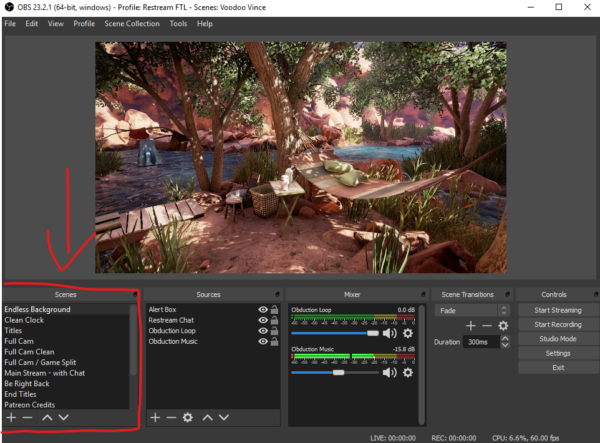
The one that’s highlit (Endless Background in my example) is the one that’s showing. You can now switch to another one by clicking on any scene in the list. We’ll talk more about other ways to switch between scenes a little later. For now, let’s take a look at how we can create them, and group them together depending on the project we’re working on.
Scene Collections
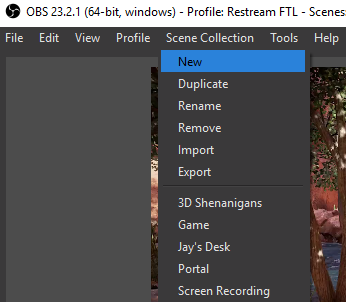
By default, OBS Studio creates one default Scene Collection for you. It probably contains a single scene (named “Scene”), in which you may have setup the sources you’d like to show. This whole box is actually a collection of scenes. You can create a new one for another project under Scene Collections – New.
Doing so will let you assemble several new scenes for a new workflow or project you’re about to embark on. I have different collection for different streams I do, like a game stream or the educational 3D stream. Both need different setups, and Scene Collections are an easy way to switch between them.
At the bottom of this list you can choose which collection to switch to, while you can duplicate, rename or remove your scene collections at the top.
Adding New Scenes
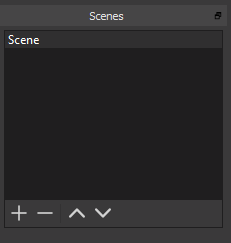
Let’s take a closer look at the Scenes Window at the bottom of OBS. Mine only has a single scene in it right now, perhaps showing my web cam in full screen. Let’s say I want to start a video using this, but as I talk, I’d like to switch to the desktop and demonstrate something. I’m going to create a new scene using the plus icon at the bottom right.
This brings up a modal dialogue that lets me name my new scene, and then it’ll drop into this list. The new scene will be empty by default and I have to start from scratch building what I want to show. If you have something that’s almost there, with plenty of sources, it might take a while to recreate from scratch.
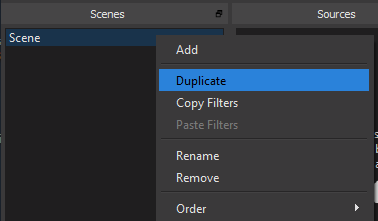
To save myself some work, I could duplicate myself and then make modifications instead. For that, right-click on an existing scene and choose duplicate. You can also use this menu to remove and rename scenes, and even apply specific transitions (but we’ll leave that for another day).
You can create as many scenes as you need, for example:
- title sequence
- web cam in full screen
- desktop with inset web cam
- desktop zoomed-in on top left corner
- desktop clean
- end credits
Switching Scenes
Once setup, you can switch to any of your scenes simply by left clicking on them. OBS Studio will apply a transition and cut to the next scene. The transition is a dissolve/fade of 300ms (that’s 1/3 of a second, or 10 frames in 30fps) and it works nicely for most occasions. You can change this transition to a cut or a wipe in the menu on the bottom right.
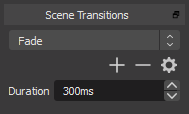
You can add transitions with the plus icon, then use the menu to pick what suits your taste, and even chance the duration if you like. I usually use the default settings, because that’s exactly how I would probably set this up myself. Wipes and things are a little too intense for my taste.
Anyway, a single click is not the only way to switch scenes. You can also use shortcut keys to do this. Any key can be mapped to trigger a switch to a particular scene. For example, if some of your F-keys or NUMPAD keys aren’t doing much, you can use those to turn your keyboard into a vision mixer. Under Settings – Hotkeys you’ll find a big list of everything you can trigger with a key of your liking.
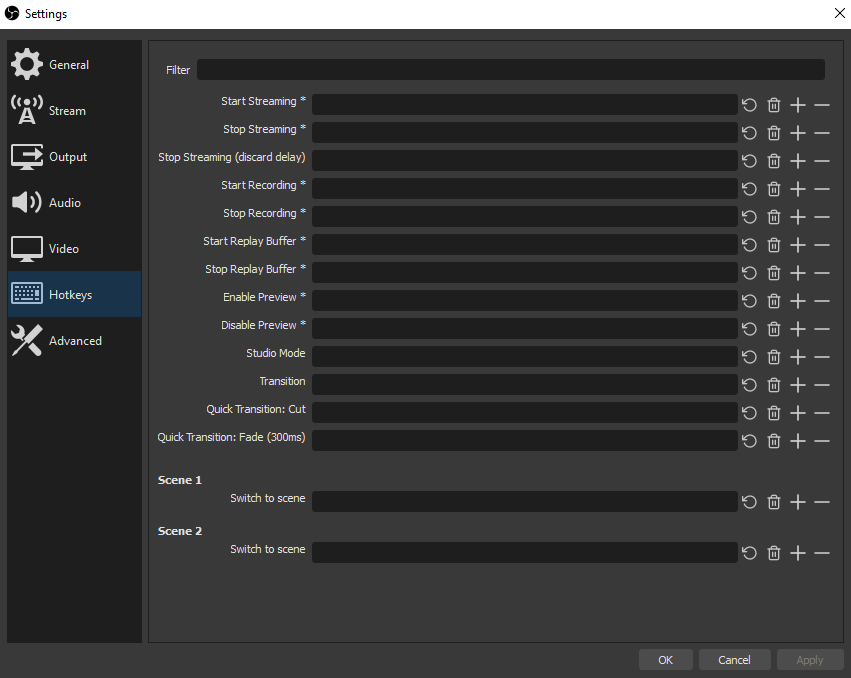
Click into the text field of your choice, then click a button and it should show up in the list. Hit Apply and try it out. It’s like magic. You can even use things like external devices like game controllers and programmable mouse buttons. Anything that can trigger a key event will show up here.
There’s a handy device called Stream Deck if you’re keen to improve your live streaming skills. It comes with a really handy software that allows you to trigger scenes and events from OBS with dedicated backlit buttons. Check it out here.
If that’s overkill for your needs, and you need every single button on your keyboard for the software you’re demonstrating, I recommend putting OBS onto a second monitor and using the single-click option for switching with your mouse.
Studio Mode
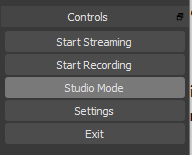
OBS has another interesting feature that lets you preview the next scene before switching to it. This comes in handy if you have to frame up hots before you put them live, or if you’re waiting for an event to “fall into place” so to speak before cutting to it. This feature is called Studio Mode, and you can activate it on the bottom right of OBS.
When you enable this, your preview window will split into two. On the left hand side is a preview of your next scene, while the right hand side still shows what’s currently going out “to air”. Now when you click on a scene in your ling list of scenes, it will only switch the preview window, but it won’t affect your program output.
To transition to a new scene, you must double-click instead. Keyboard shortcuts are not affected by this change, they still switch a scene with a single press.
Re-using Sources in other Scenes
The way OBS thinks about the sources you use in your scenes is interesting to note. Let’s take a web cam as an example. Once setup, you can use the same source without having to re-configure the web cam settings all over again. So rather than creating a new source, use the one that already exists in the list.
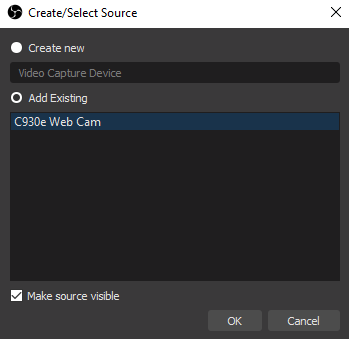
I’m mentioning this because it’s not exactly an intuitive process. Under Sources, click the plus button to add another device of the same kind (like a Video Capture Device for a web cam), then choose Add Existing. Now you must select the item in the list until it highlights blue, and the click OK.
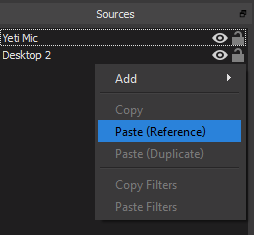
An even easier way is to copy and paste a source, using the right-click context menu. When you do, you can paste a reference, which will do the same thing. I just thought I’d mention both options here.
If you have any questions, please let me know. OBS Studio is a complex app, but once you get the hang of it, you’ll find it an invaluable tool in your video tool box.
Sweet! This is one I’ll definitely keep on my ‘refer to often’ list! Great info, and I’ll be using this info on my BTS and tutorial videos. Thanks, Jay! You’re the best!
is there any way to copy a scene from one collection into other collection?
Sadly not, I’d like to see that feature too. The best you can do is to setup one collection (like a base), then duplicate the whole collection and make amendments as necessary. For example, one “generic” collection with the scenes you use most, then duplictate that and tweak the new collection for a particular project.