
I usually write about Unreal Engine over on my other website, because it tackles more 3D related topics – but compiling the engine from source is a bit more “blood and gore” thing so I thought it best placed here with all the other Linux topics. Anyway…
Today we’re installing Unreal Engine on a CentOS 7 system. The latest version at the time of writing is 4.22.3 to be exact. Linux knowledge and a GitHub account are required, and your GitHub account needs to be linked against your EPIC Games account. While the engine source code is available for free, it’s not Open Source. There are no pre-compiled binaries available for any distribution, so let’s compile from source. It’s always a nice challenge.
If you’re running Unreal Engine on Windows and would like to build a Linux version of your game, it may be easier to Cross Compile option and create a Linux binary straight from Windows.
Getting the code
I’ll use git from the command line to checkout the latest version. We’ll get it from here. Click the green button on the right to obtain the URL for the release version (or any other version you prefer).
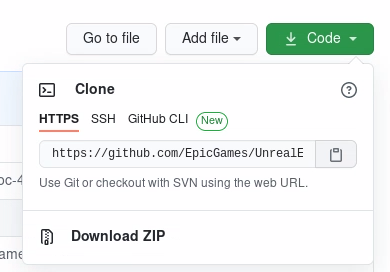
Open a Terminal Window with Administrator rights, make yourself a memorable directory somewhere nice, navigate to it and let git do the heavy lifting.
git clone https://github.com/EpicGames/UnrealEngine.git
It’ll ask for your GitHub credentials and download all necessary files to your hard drive. It’ll finish with something like this:
remote: Enumerating objects: 34, done.
remote: Counting objects: 100% (34/34), done.
remote: Compressing objects: 100% (32/32), done.
remote: Total 2883868 (delta 16), reused 8 (delta 2), pack-reused 2883834
Receiving objects: 100% (2883868/2883868), 3.75 GiB | 17.24 MiB/s, done.
Resolving deltas: 100% (2005102/2005102), done.
Checking out files: 100% (126569/126569), done.
Building the project
We need some packages that will let us compile source code. They’re not guaranteed to exist on every system by default. So that we’re both on the same page here, let’s start with some essentials on which we can build should the need arise:
yum groupinstall "Development Tools"
Git should present us with a single directory in the current folder, namely UnrealEngine. Change into this folder and begin the building process by executing the included Setup.sh file. Grab a cup of coffee while CentOS downloads some dependencies and does other exciting things for us. It’s always fun to watch.
cd UnrealEngine
./Setup.sh
I’ve had a window pop up asking if I wanted to register the Unreal file types (to which I’ve agreed). IF all went well, you’ll get control of your Terminal window back with the message “Setup successful”. That’s a good start!

While the above did a sort of “pre-flight check”, the actual linking and compiling comes next. Let’s setup the necessary project files with
./GenerateProjectFiles.sh
This shouldn’t take longer than a couple of minutes. The next part however does depend on how fast your CPU is. EPIC reckon this can take anywhere from 10 minutes to over an hour. I’ve timed this on my 16-threaded dual Xeon machine and it took around 90 minutes. Enter the magic command at your own peril:
make
That’s it! When the Terminal window gives you back control, and there are no spurious error messages, the project is ready to be launched.
Starting Unreal Engine (or failing miserably)
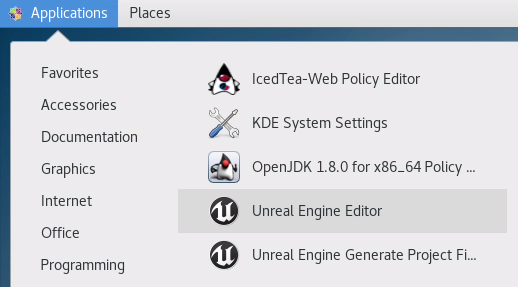
After installation I found two handy shortcut icons under Applications/Other. The Unreal Engine Editor is what we want to select.
If you’d like to start Unreal Engine from the command line, take a look at the current directory and you’ll see various new directories, each with further sub directories. It’s the result of the hard building work your CPU has done of late. The Engine folder is where the Unreal Editor is hiding, specifically under Binaries/Linux. The file you need call us UE4Editor.
To run Unreal Engine from the current directory, type
Engine/Binaries/Linux/UE4Editor
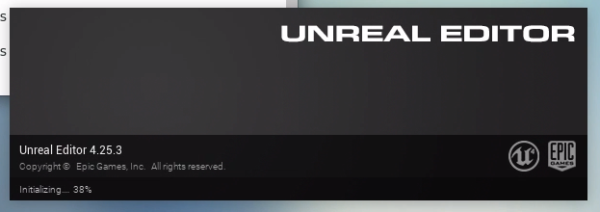
The fist startup will take some time (on any platform) due to the initial shader compilation process. If all goes according to plan, you’ll see the familiar logo come up and some work being done in the background.
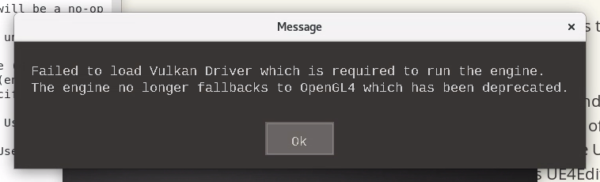
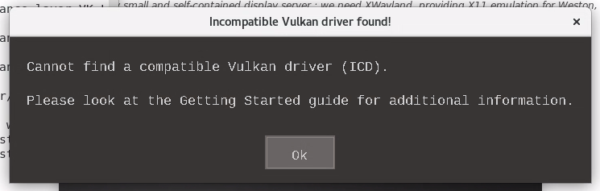
Driver issues
If you already have the latest and greatest drivers for your graphics card installed, UE4 might start without a hitch. I on the other hand was not so lucky because the default Kernel-supplied nouveau driver was installed on my machine.
Even installing any available Vulkan packages did not do the trick. That makes sense I guess, we have to get dedicated drivers on Windows too.
I have two K4000 GPUs on this system, and dedicated Linux drivers were indeed available from the NVIDIA site. However, disabling the default nouveau driver was a tad tricky. Thanks to Vivek Gite’s excellent article I could remove mine and install the NVIDIA drivers. I would have had to do the same thing with my GTX or RTX cards I wager. I don’t have an AMD card, so the remainder of this article assumes that you’ve run into the same issue, and that you also have an NVIDIA card.
Here’s what I had to do for completion. Boot into command line mode:
systemctl set-default multi-user.target

reboot now
Disable the nouveau driver:
vi /etc/default/grub

GRUB_TIMEOUT=5
GRUB_DISTRIBUTOR="$(sed 's, release .*$,,g' /etc/system-release)"
GRUB_DEFAULT=saved
GRUB_DISABLE_SUBMENU=true
GRUB_TERMINAL_OUTPUT="console"

GRUB_CMDLINE_LINUX="rd.lvm.lv=centos/swap vconsole.font=latarcyrheb-sun16 rd.lvm.lv=centos/root crashkernel=auto  vconsole.keymap=us rhgb quiet modprobe.blacklist=nouveau"

GRUB_DISABLE_RECOVERY="true"
Note how I’ve appended modprobe.blacklist=nouveau to the penultimate line there, followed by a re-compilation of the boot configuration and a restart:
grub2-mkconfig -o /boot/grub2/grub.cfg

reboot now
Installing the NVIDIA Drivers
NVIDIA have update utilities for Linux on their website. They come as .run files, which can be called like a shell script. I’m not quite sure what the magic under the hood is, but it appears that they self-compile and execute. All we have to do is download the right version, make it executable and run it as administrator:
wget https://us.download.nvidia.com/XFree86/Linux-x86_64/450.66/NVIDIA-Linux-x86_64-450.66.run (or whatever your driver is)

chmod +x ./NV*

./NV*
That took care of that! Now we can switch back to booting into our GUI and restart the system:
systemctl set-default graphical.target

reboot now
And that, as they say, was that. With nouveau out of the picture, and the latest NVIDIA drivers at the ready, I could start Unreal Engine without issues. It even performed much better than I had expected with my K4000 cards.
Congrats if you’ve made this this far!
Further Reading
- https://docs.unrealengine.com/en-US/Platforms/Linux/BeginnerLinuxDeveloper/SettingUpAnUnrealWorkflow/index.html
- https://docs.unrealengine.com/en-US/Platforms/Linux/GettingStarted/index.html
- https://www.cyberciti.biz/faq/how-to-install-nvidia-driver-on-centos-7-linux/
- https://www.nvidia.com/en-us/drivers/unix/
- https://wpguru.co.uk/2016/11/how-to-boot-centos-7-into-command-line-or-gui-mode/