
I like the idea of having a shared drive attached to my always-on Linux system, so that all my computers (Windows and Mac) can access those in a central place. It’s like a NAS without having a NAS box if you know what I mean. The easiest way to accomplish this is by using the Samba Protocol.
Essentially we’ll declare a part of our Linux system as a Samba Share, setup credentials in Samba, then let users from other systems access these files. It’s a little complex to get going, but I’ll show you all the relevant steps here. This works on CentOS 7 and Fedora.
Installing Samba
Let’s get the packages installed first:
yum install samba
This should bring up samba and install samba-common-tools as well. Let’s also start and enable Samba on system start while we’re at it.
systemctl enable smb
systemctl start smb
Setting up Samba Credentials
I already have a regular Linux user on my system, let’s call him “shareuser”. Samba needs its own password for a user, which can be a different one from the system password. We can set this up with the following command (as root), which will prompt for a new password.
smbpasswd -a username
You can run the same command as the system user too without specifying a user. man smbpasswd has more details. Once confirmed, the current (or specified) system user will be added to the Samba user group.
Setting up the Shared Folder
We need to pick a folder we’d like to use. It can live anywhere on the system, even on mounted drives. All we need is the full path to it and set it up in the Samba configuration file. We can find it here: /etc/samba/smb.conf
Use your favourite text editor and add the following to the bottom of the file:
# My Samba Share
[supershare]
path = /home/shareuser/Desktop/supershare
available = yes
valid users = shareuser
read only = no
browsable = yes
public = yes
writable = yes
I’m calling my share “supershare” here, but that’s arbitrary. The idea is that you could have various locations for different users on one system. My system (and Samba) user is called “shareuser”, and my folder location is on his Desktop. It could be anywhere else of course.
Setting the Samba Protocol
With the above configuration, macOS and other Linux systems can already access the shared folder. Windows 10 however will throw an error (or rather not connect without any clue as to what’s wrong), because the SMBv1 protocol is no longer supported for security reasons. Something about a the WannaCrypt/WannaCry exploit and ransom demands.
To keep us safe, let’s ask Samba to use a newer protocol by default instead. SMBv2 will work, and depending on your Linux (or rather Samba) version you can go up to 3 or 4. Find the [global] section in your Samba config file and add the following as the last line before the next block (leave all other lines intact).
[global]
min protocol = SMB2
After any change to the config file, we need to restart the Samba service:
systemctl restart smb
Firewalld and SELinux
By default Samba connections are blocked by the firewalld service. We can fix this by adding the following rule:
firewall-cmd --add-service samba --permanent
systemctl restart firewalld
If SELinux is enabled on the system, you can optionally add the following value to allow the Samba service write access (not necessary if SELinux is disabled or permissive):
setsebool smbd_anon_write=1
Restart the system after setting this, otherwise the changes won’t take effect.
Accessing Files from Windows 10
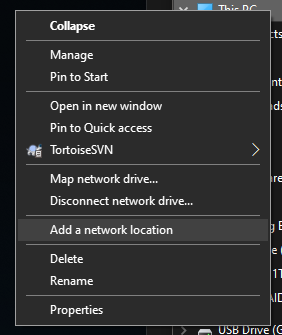
Now comes the moment of truth: can we connect from Windows? There’s various ways of doing this, but the easiest one is to setup a permanent connect so we don’t have to type in our credentials every time we want to access those files. Open Windows Explorer and choose Add a Network Location.
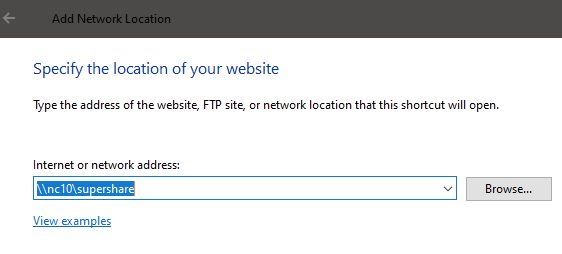
This lets you specify the location on the network, either via IP address or name. Start with two backslashes, like so
- \\10.1.2.3\supershare
- or
- \\yourserver\supershare
If the connection is successful, Windows will prompt you for credentials.
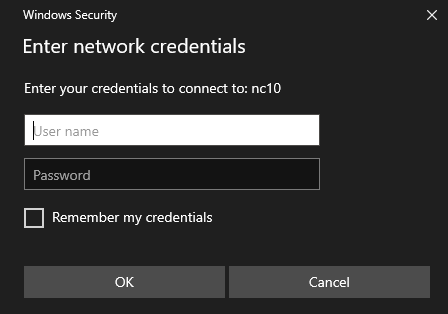
And that’s it! Now you can navigate to your shared Linux folder and copy files to it or remove them.
Accessing files from macOS
On the Mac it’s equally easy. Head over to the Go menu in your Finder and select Connect to Server.
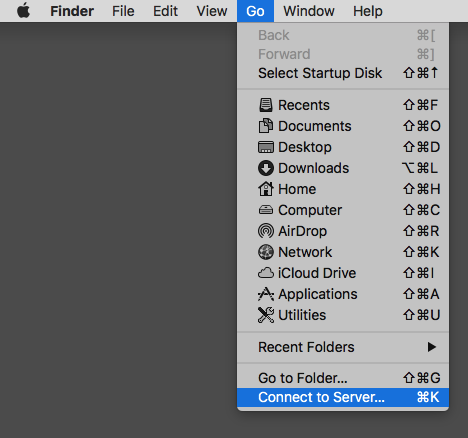
Mac likes us to specify the protocol with which we’re connecting and accepts IP addresses and server names alike:
- smb://10.2.3.4/supershare
- or
- smb://yourserver/supershare
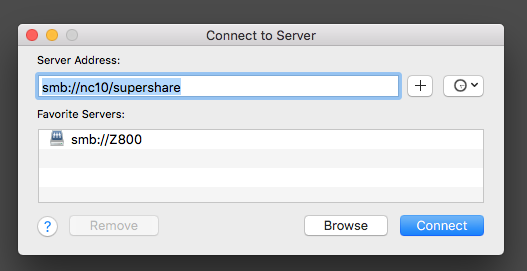
It will ask for credentials when you connect and offer to store them for next time.
Troubleshooting
The number one cause of trouble is – as always – SELinux. I don’t recall the amount of times that it has ruined my day. The easiest way to switch it into permissive mode and “just let things happen for now” is to use this:
setenforce permissiveThis will use permissive mode until you restart the Linux system. To make it permanent, take a look at this article. Remember to add Samba to the SELinux permissions as explained earlier in this article.
Another point of confusion is the duality between what a share is called in the settings (in square brackets) and what your folder is called. While your actual folder may be called “stuff”, your share can be called something else and then present the contents of the “stuff” folder. In the heat of the moment, our brains can play tricks with us.
Lastly, don’t confuse your local Linux user credentials with that of the Samba user. Those are (or can be) two different ones.