
So I’ve made affiliate on Twitch last month (YEY!!!), and one of the perks is that I can upload my own custom emote. Which is super exciting! It takes a while for those little icons to get approved, but once they’re online they add a very personal touch to a stream.
My first iteration wasn’t great, so I took another crack at it and wanted to upload the new design – having forgotten where in the deep and dark Twitch interface that setting was. I thought I’d make a not for next time, and anyone struggling with the same thing.
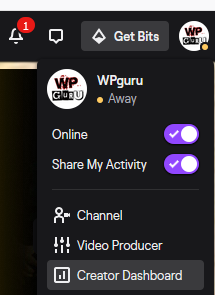
We head over to our Twitch Dashboard (https://dashboard.twitch.tv), which is accessible from the front page from our icon at the top right, under Creator Dashboard.
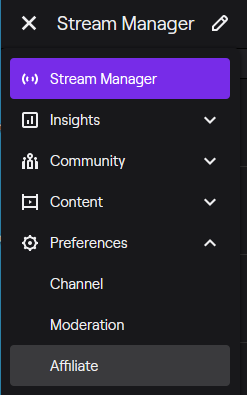
At the top left corner there’s a menu, click that and navigate to Preferences – Affiliate.
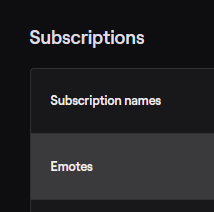
Under the Subscriptions section, there’s an item called Emotes. That’s where we need to be.
You need to upload three sizes of your emote to make the little icon look handsome on all kinds of screen resolutions and circumstances:
- 28×28
- 56×56
- 112×112
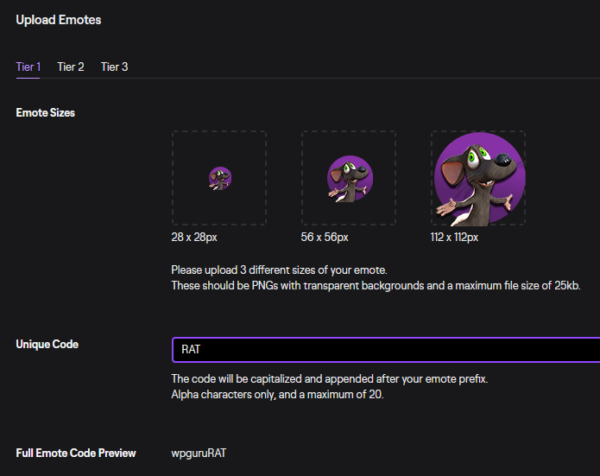
You also need to give it a unique name, made up of your channel name and a postfix of your choice. It’ll take some time for it get approved, and/or made live. Twitch will send you an email when you can use it.
Swapping emotes is possible, but it requires deleting and re-submitting them. Each subscription tier has one emote when you get started, but the more subscribers you get, the more “emote slots” you unlock. This handy article has all the juicy details: