
I’ve been enjoying NoMachine on my internal network of computers for over a year, and I haven’t looked back. I love how it works from any device without limitations and tons of options. Today I was researching how to use it for connections to remote machines that are not on the internal network, and it looks like this is also possible without trouble. Let me show you how to do it in this article.
A bit of background: I was recently using TeamViewer to connect to a friend’s computer, when the connection was abruptly terminated. TeamViewer told me I had been locked for a few minutes, but every time I tried to connect, it gave me same message. Although I did not get a “suspected commercial use” warning, I need an alternative that’s working (sorry TeamViewer, $600 a year without a monthly option is too much).
Installing NoMachine
Before we begin, NoMachine needs to be installed on both systems, the server and client. Those are abstract terms really, but they mean “the computer you connect FROM” (i.e. yours), and “the computer you connect TO” (i.e. your friend’s/client’s).
Get the latest version of NoMachine here.
Once installed, restart both systems if you haven’t used NoMachine before. This will ensure that the service adds itself to Windows and opens the relevant ports to enable a connection.
Connecting to remote machines
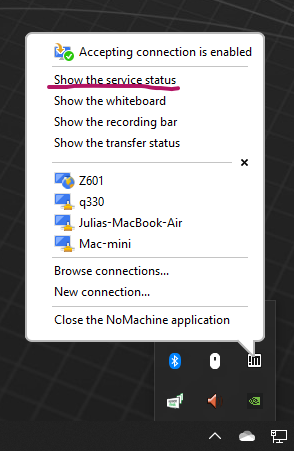
You don’t need to do anything on the remote machine yet, but it needs to be switched on and running. We need some details to establish the connection though, so let’s grab those next. Ask the person on the other side to open the little chevron icon in the Windows Task Bar, right click on the !M icon and select Show the Service Status.
This will bring up a page similar to this one:
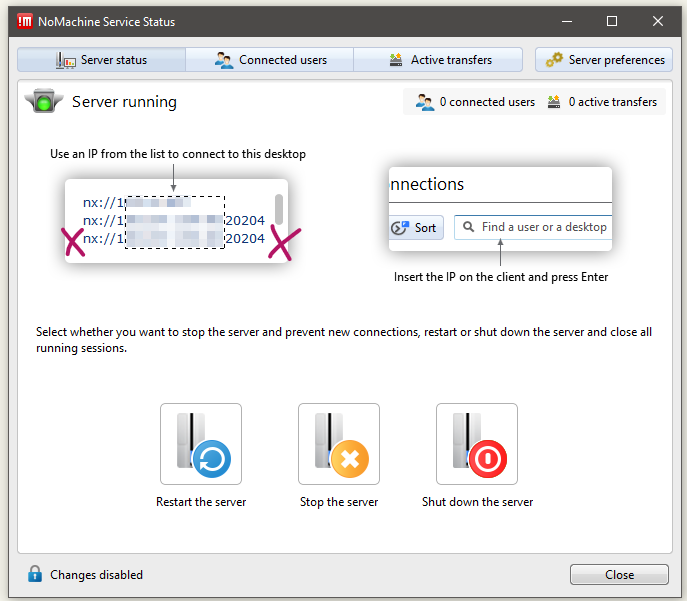
There’s a section with IP addresses at the top. The first one is the internal IP address. We can use that for connections on the same network, but not for remote connections. Instead we need the last one on the list that looks like nx://12.34.45.67:20204.
Ask for this IP address, along with the credentials for the remote machine (user name and password).
Now start NoMachine on the computer you’re connecting from (i.e. your computer) and choose New.
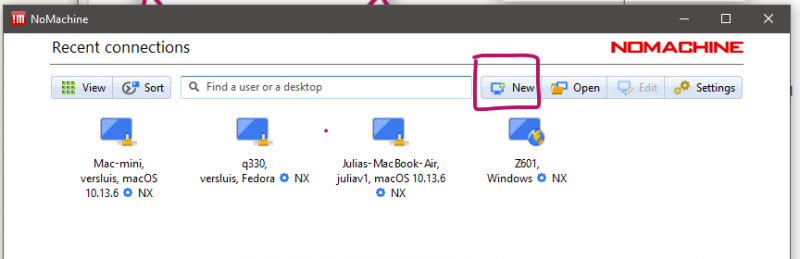
Choose the NX Protocol (not SSH), then specify the IP address of the remote computer and the port that was setup (that’s the 4-5 digit number at the end of the remote IP address). Specify the credentials when prompted and you’re logged in!
When you connect the next time, the new remote machine will be saved as a recent connection, along with the remote credentials if you wish. This makes for super easy subsequent connections.